

How to remove the mainboard of CrowPi L?

Tools preparation
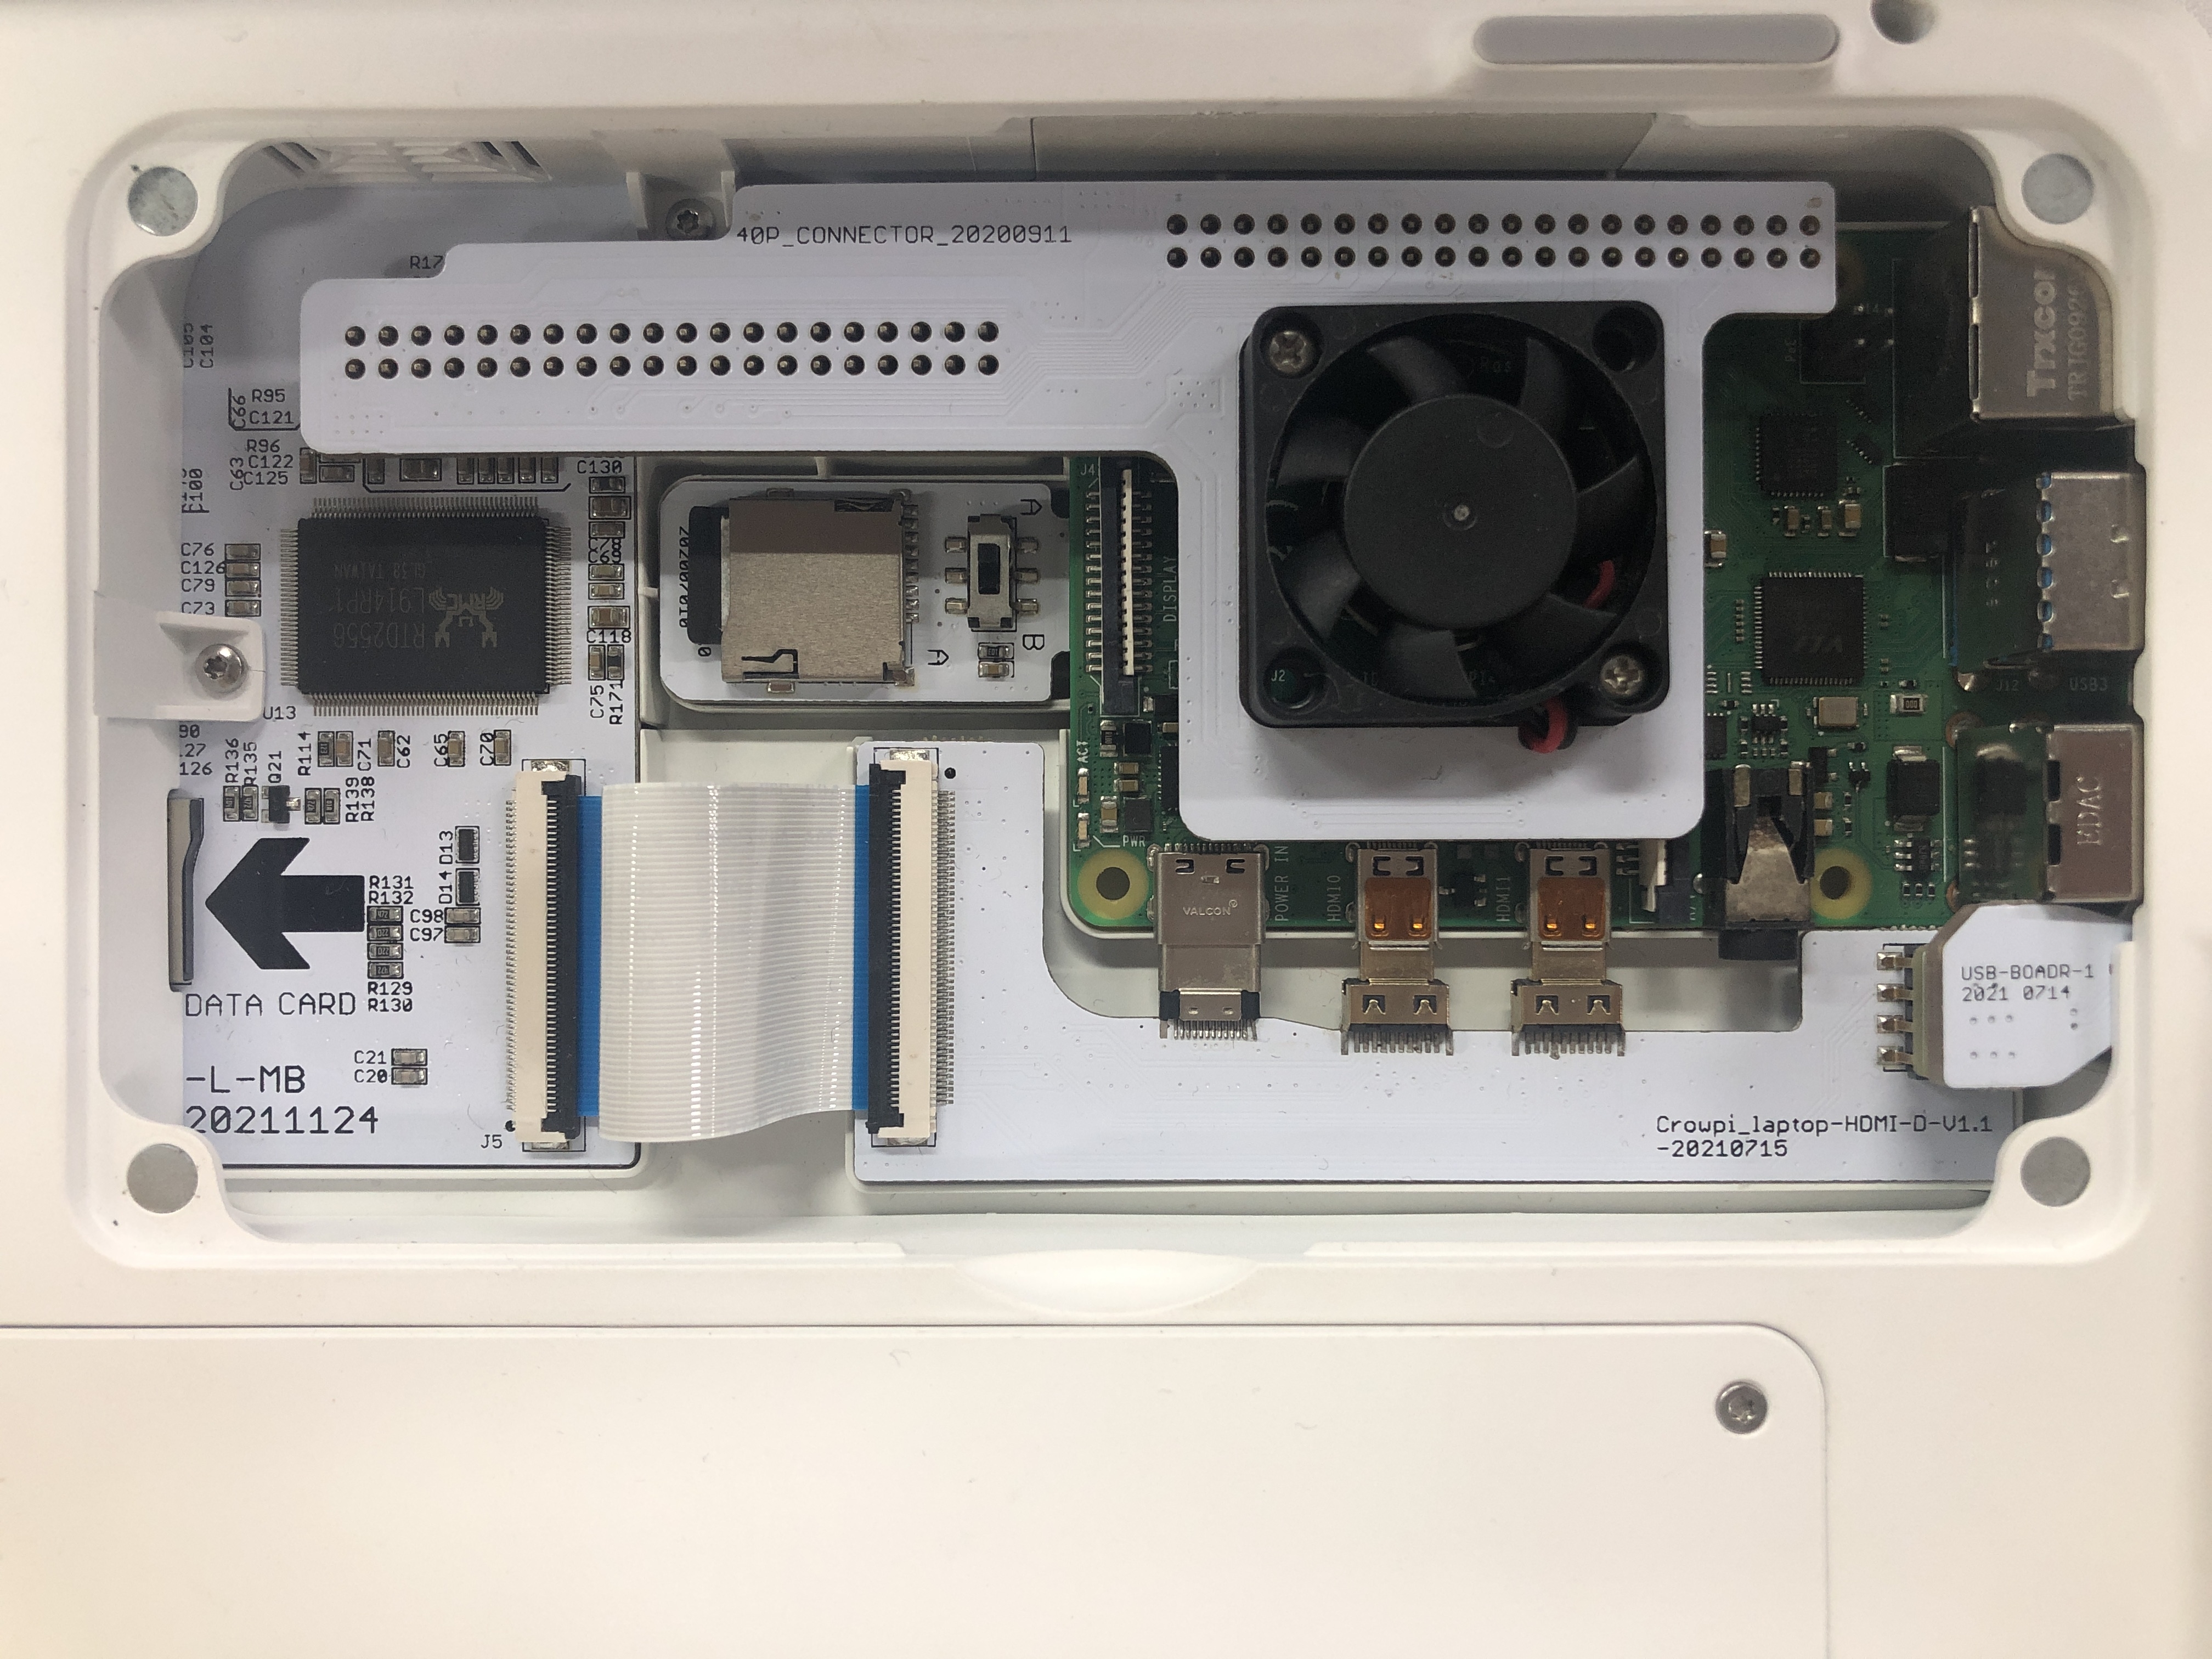
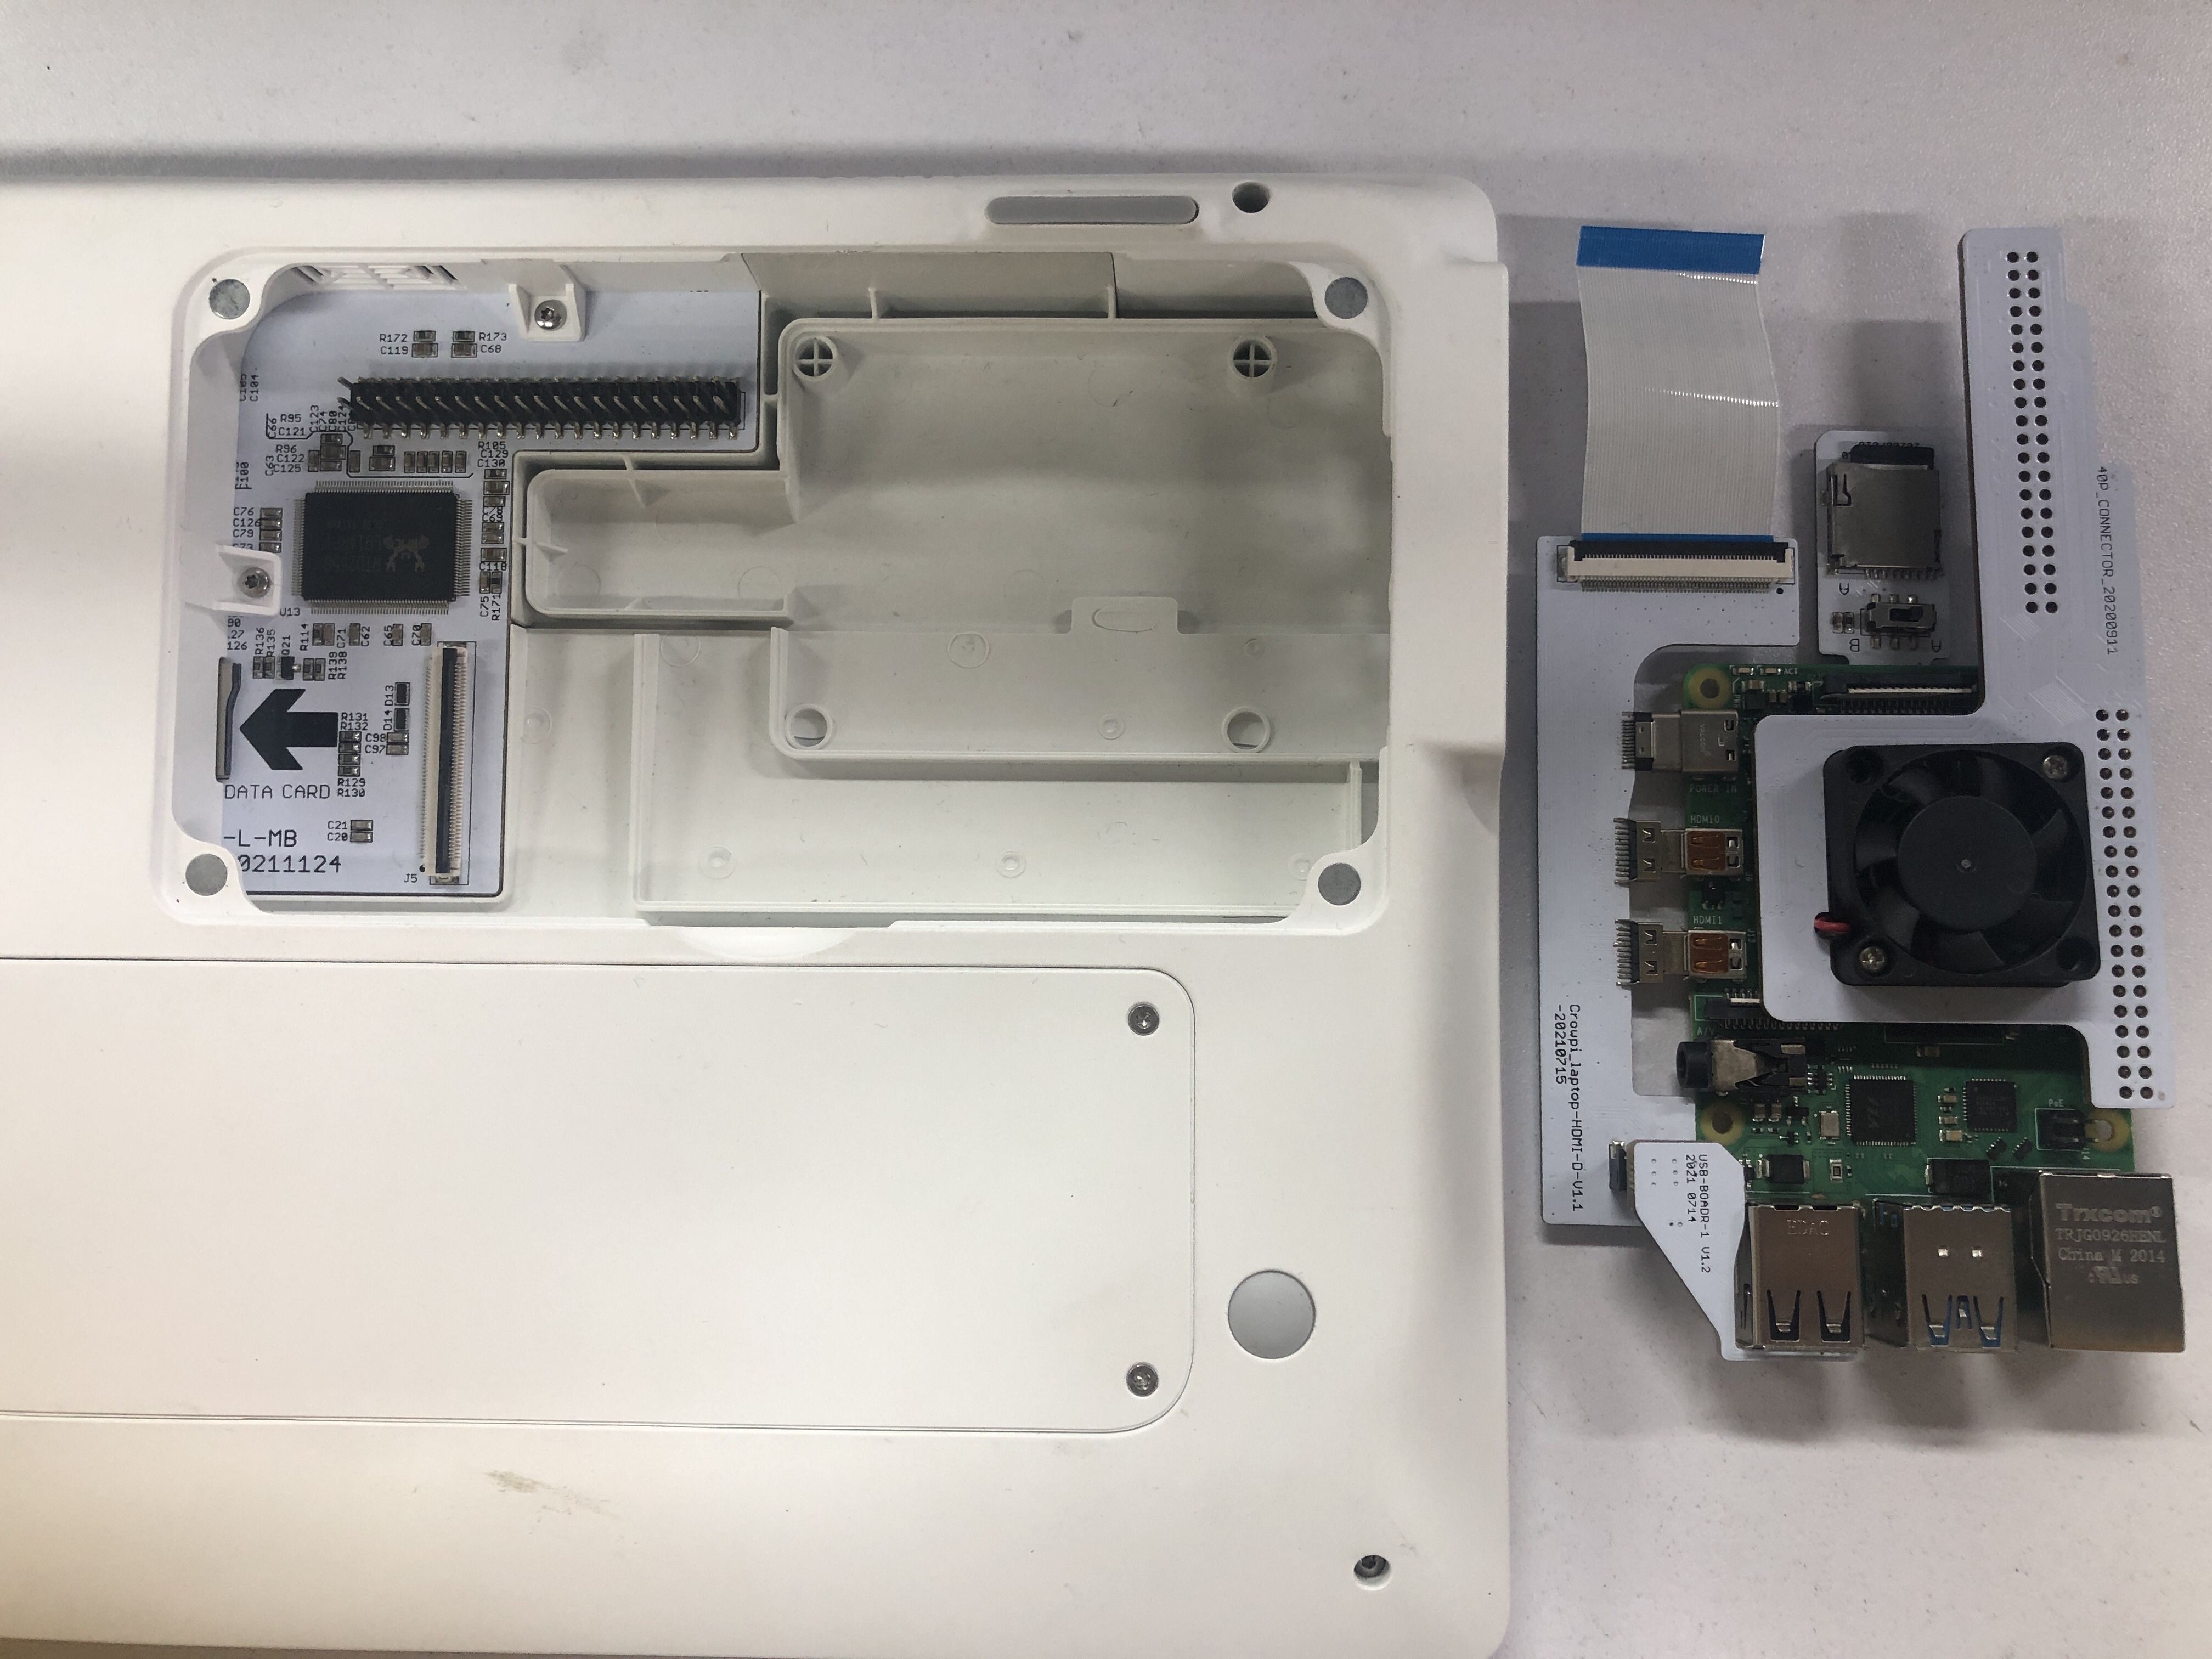
Step 1 Remove the Raspberry Pi
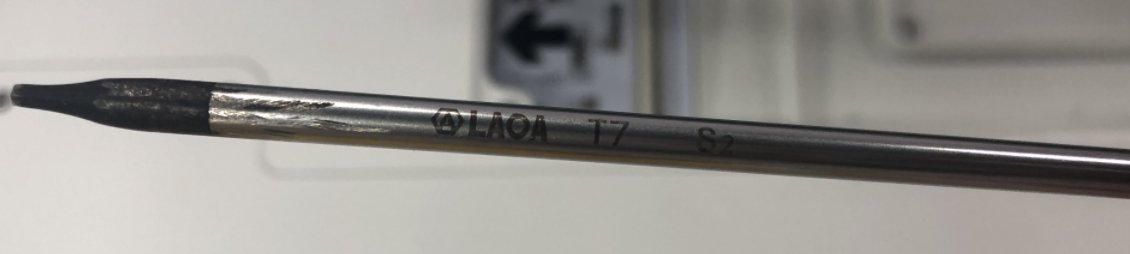
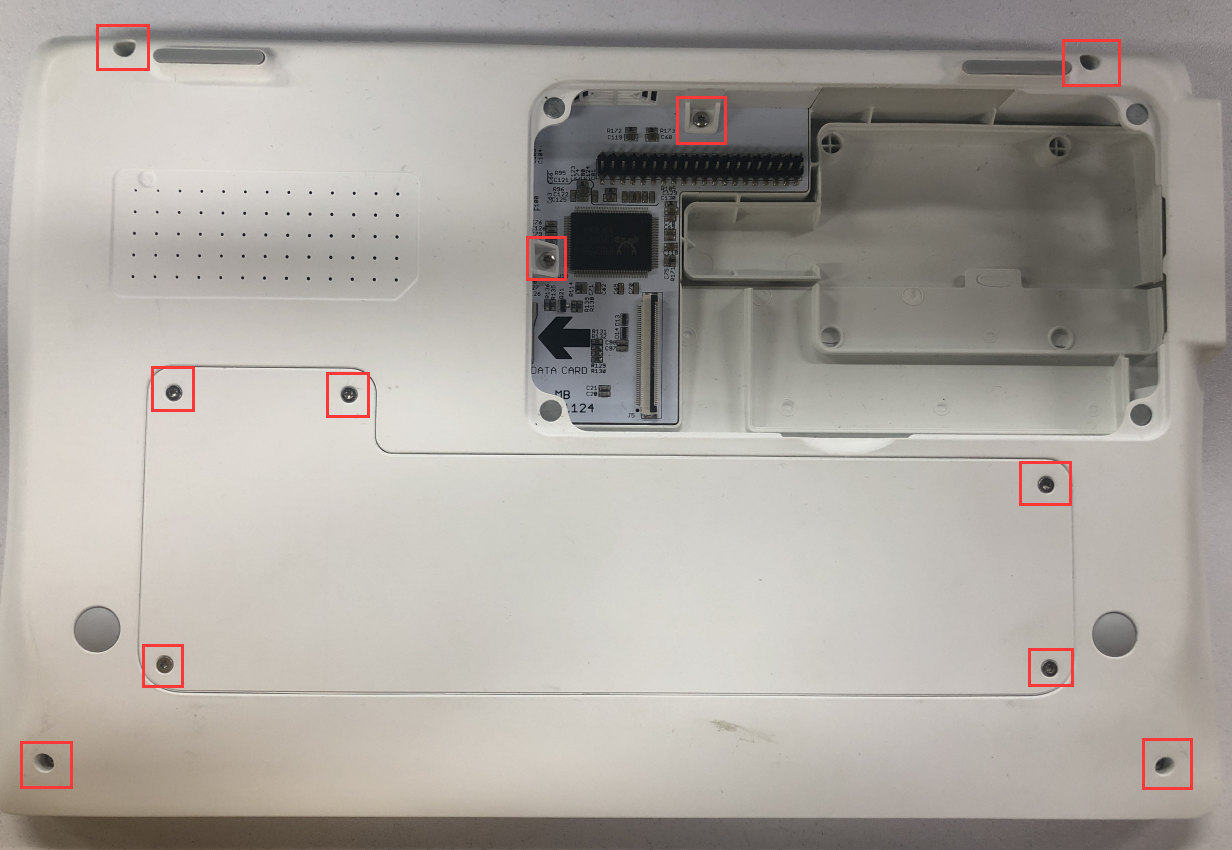
Step 2 Use T7 torx screwdriver to move the screws
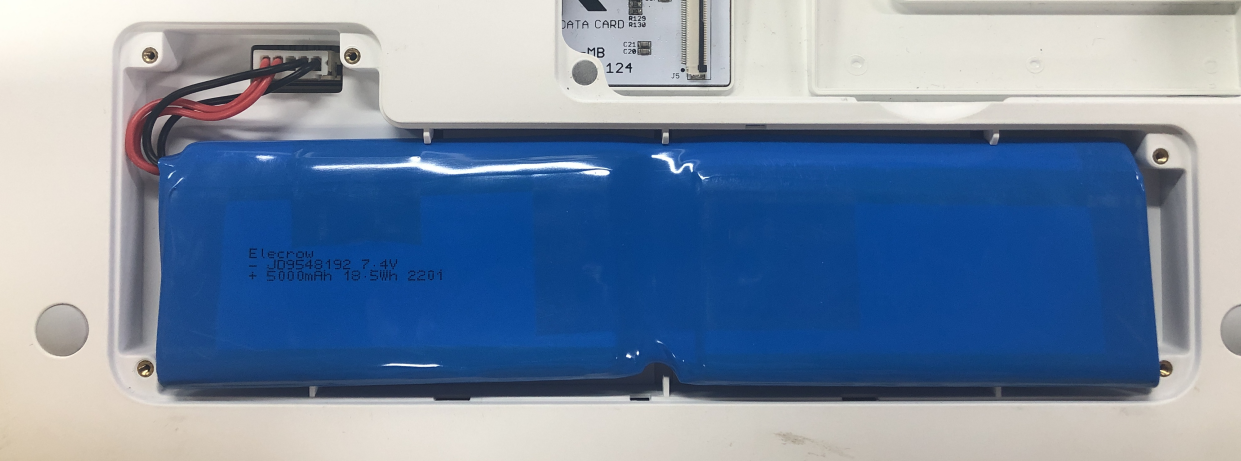
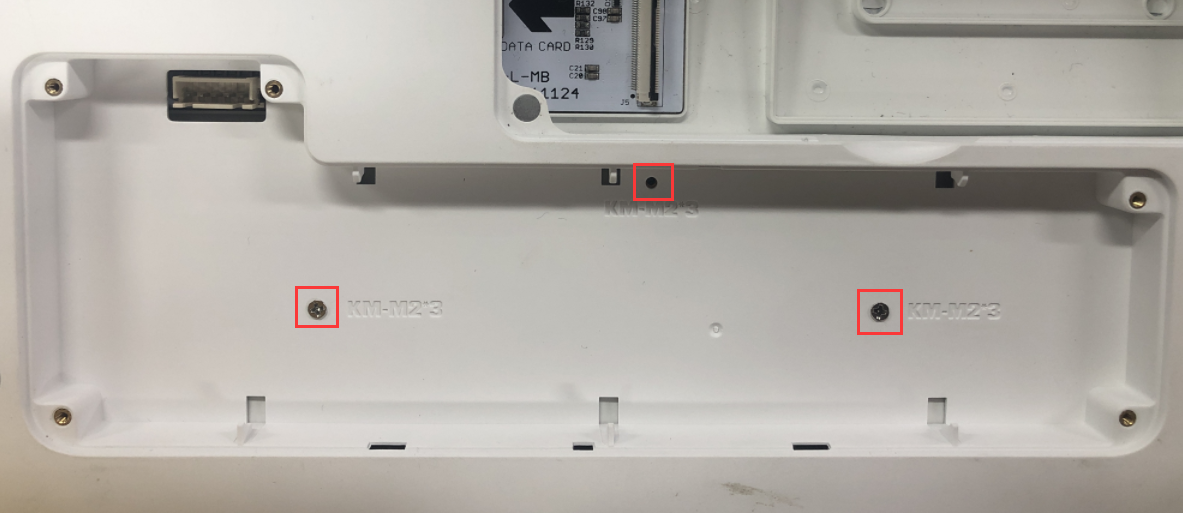
Step 3 Remove the battery cover and remove the battery. Then use cross screwdriver to remove the screws down below the battery.
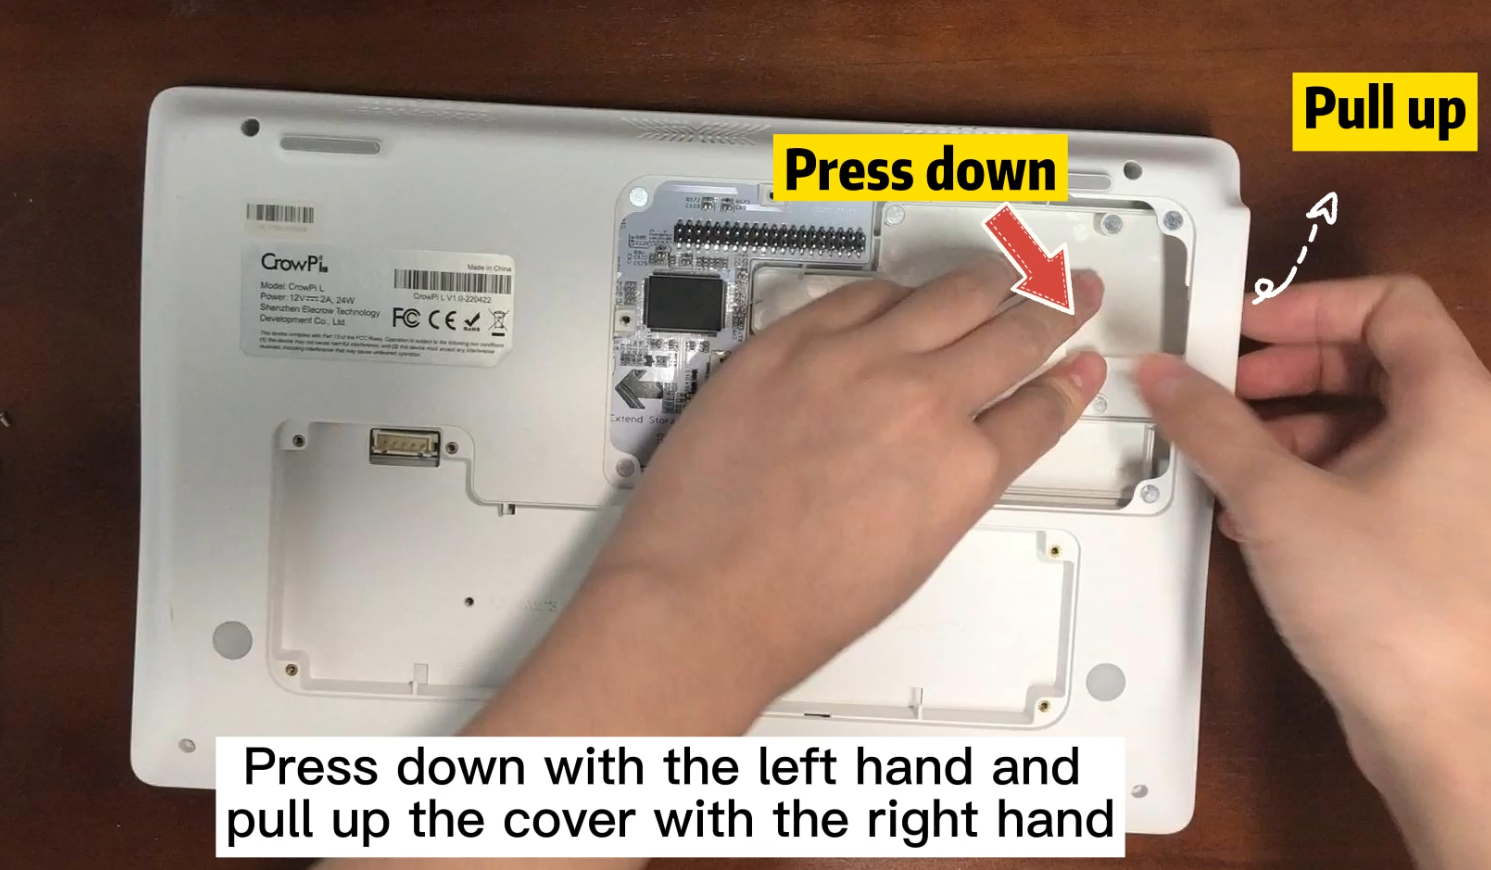
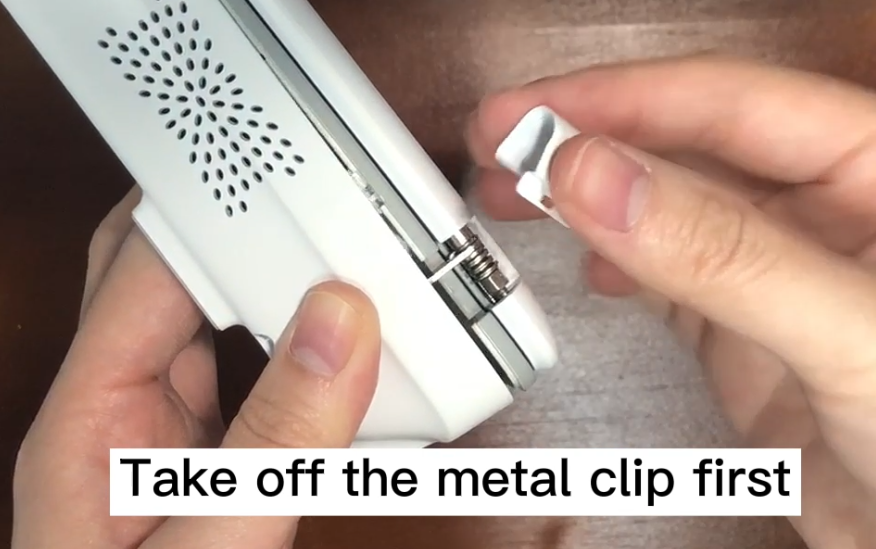
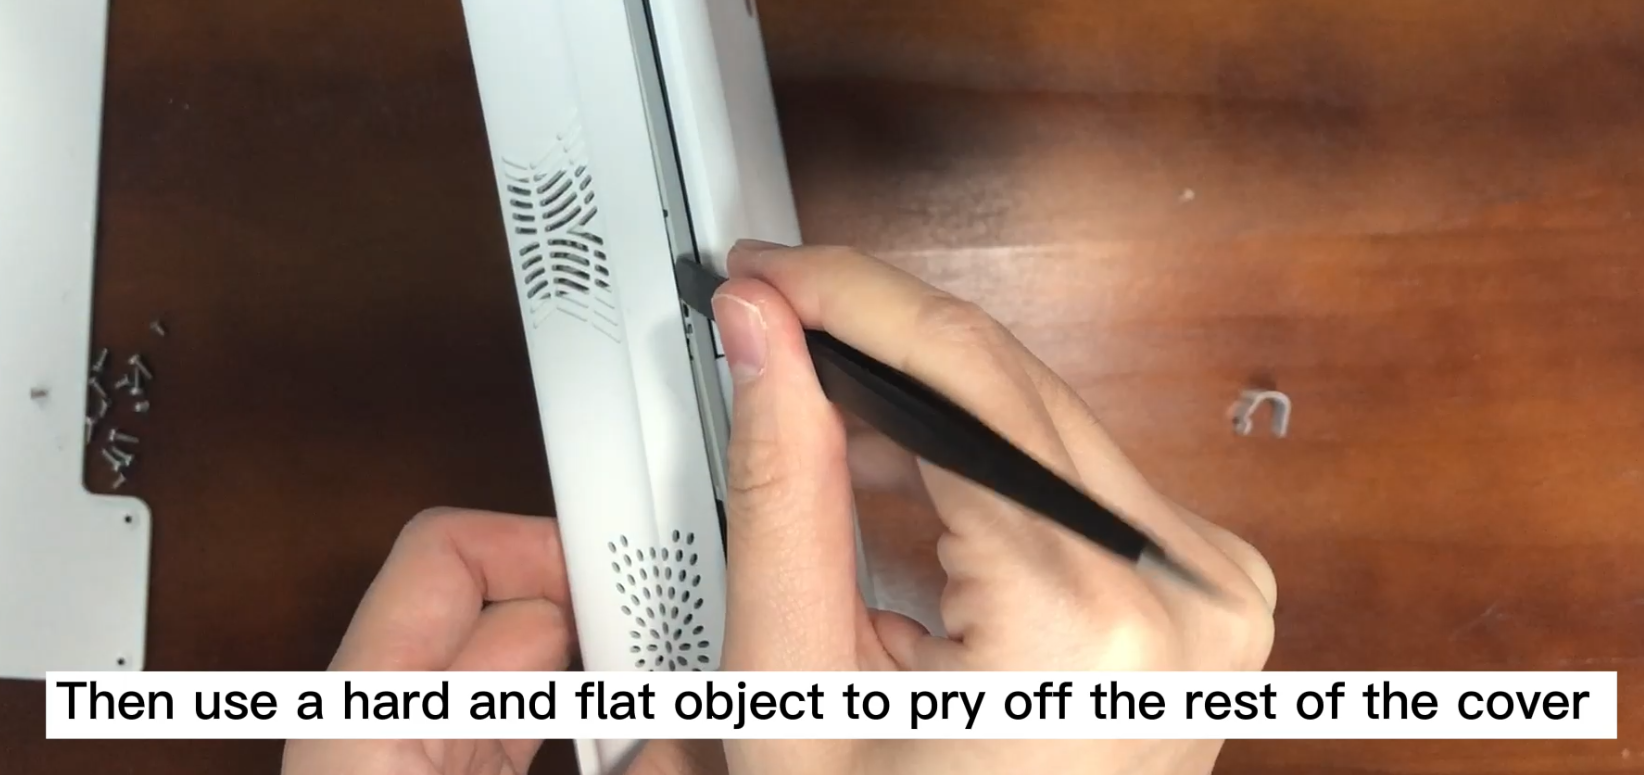
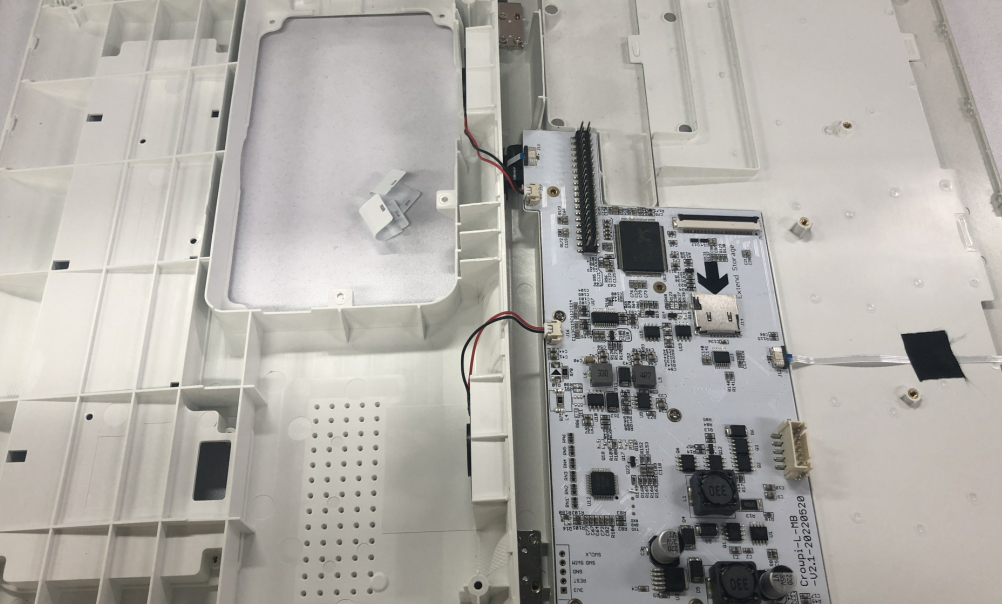
Step 4 Remove the cover forcibly, and remove the speaker cables.
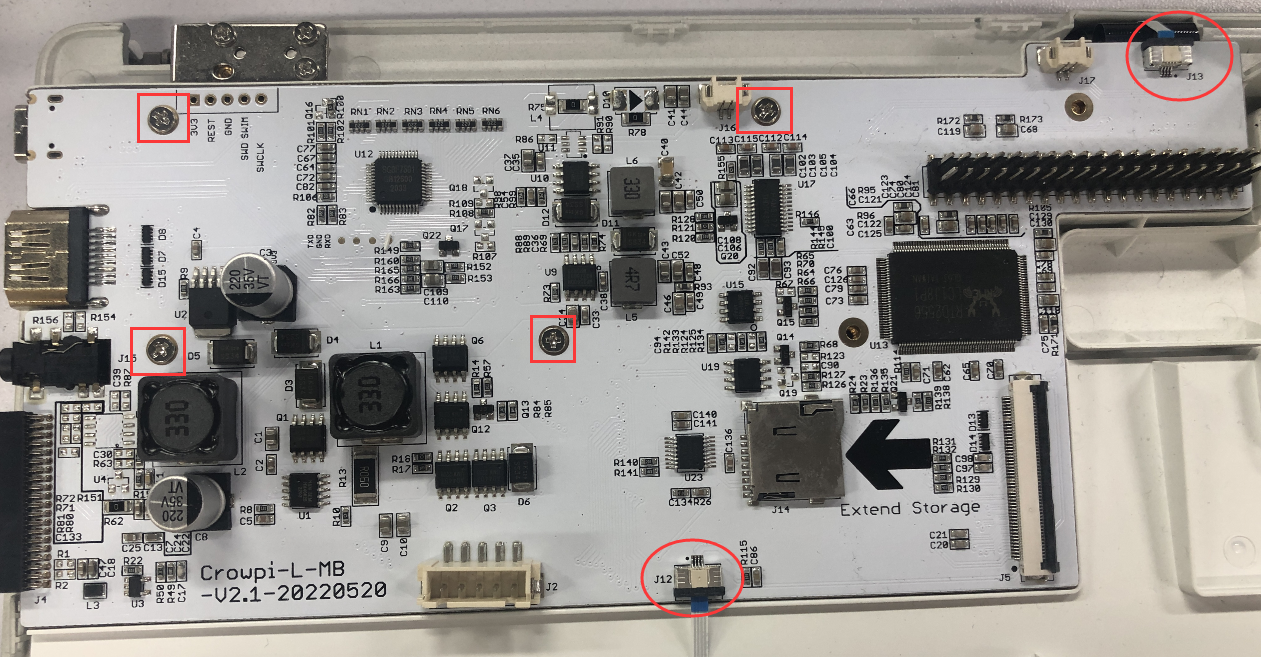
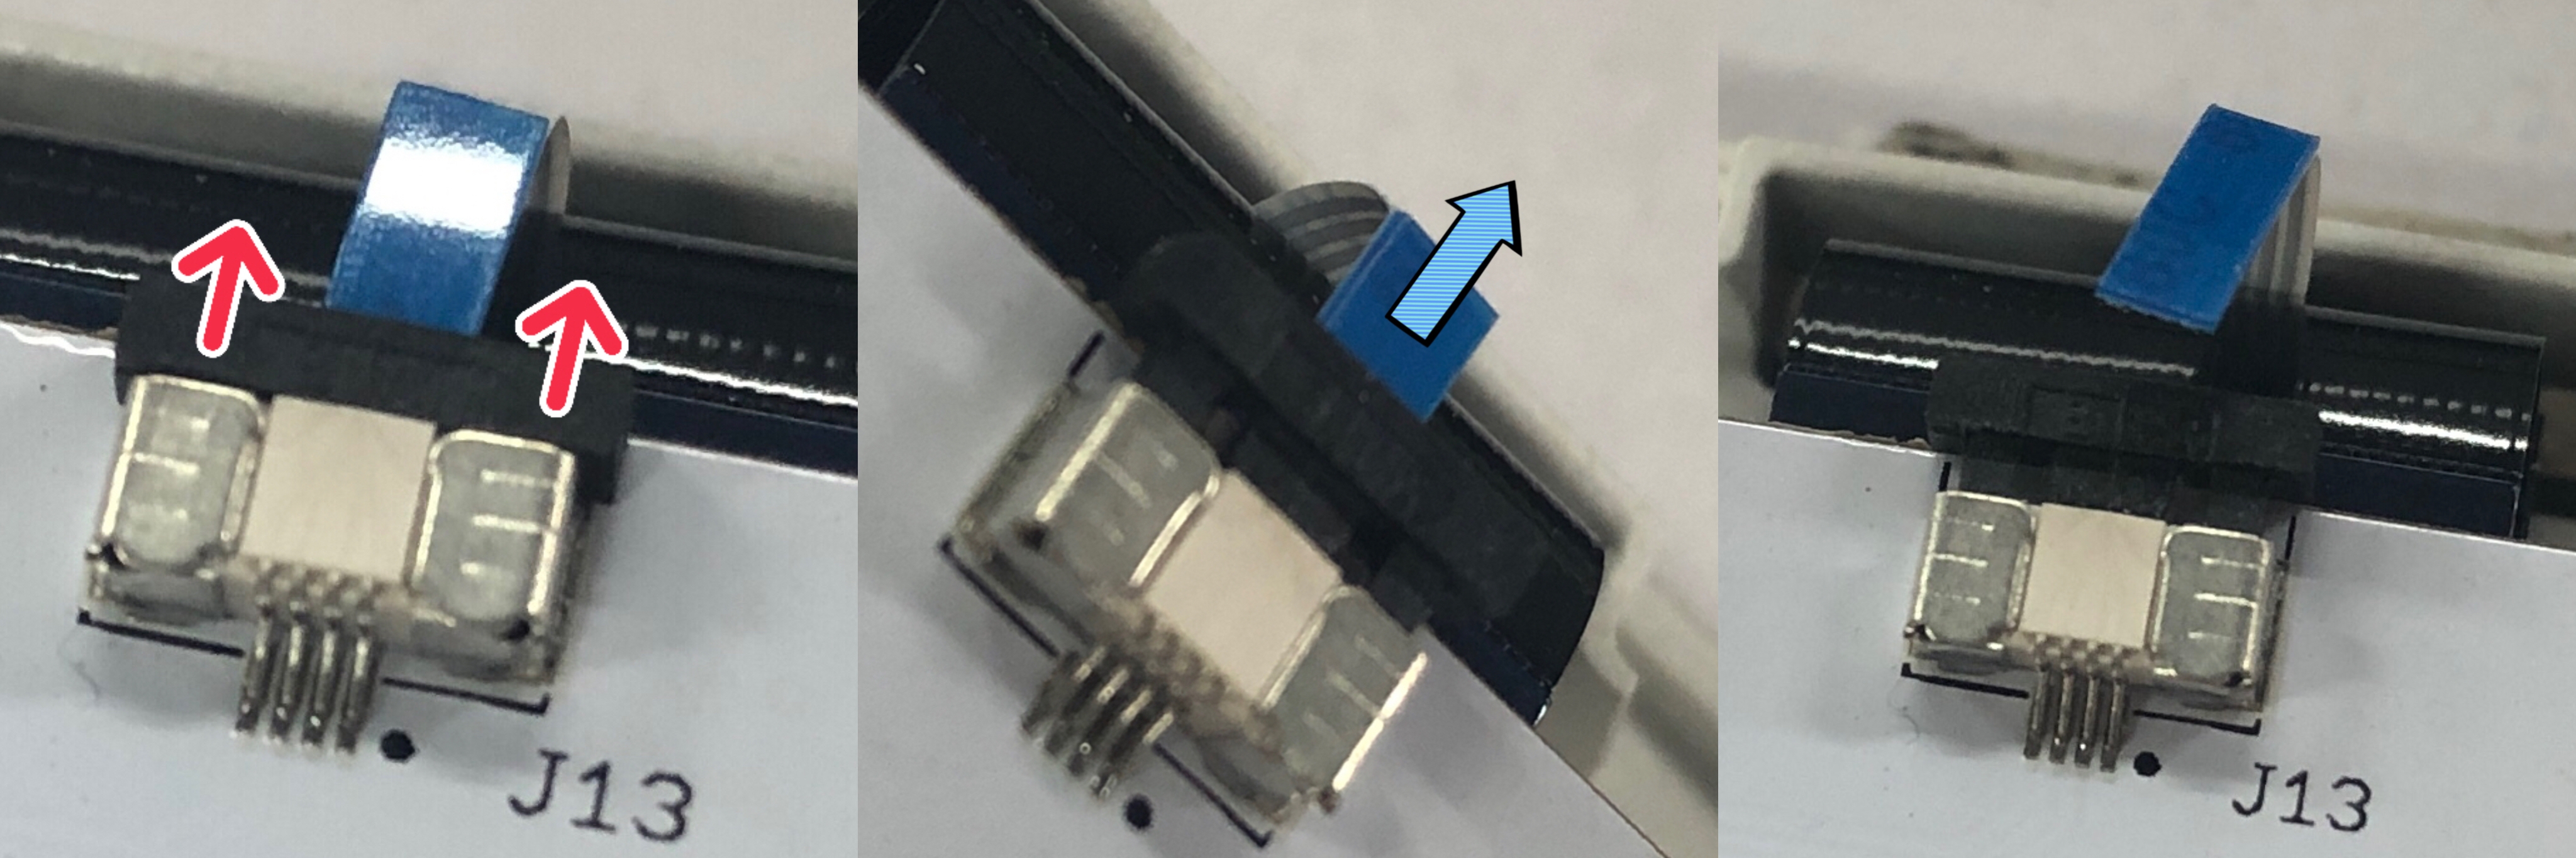
Step 5 Use cross screwdriver to remove the screws on the mainboard. And remove the flat cables at J12 and J13.
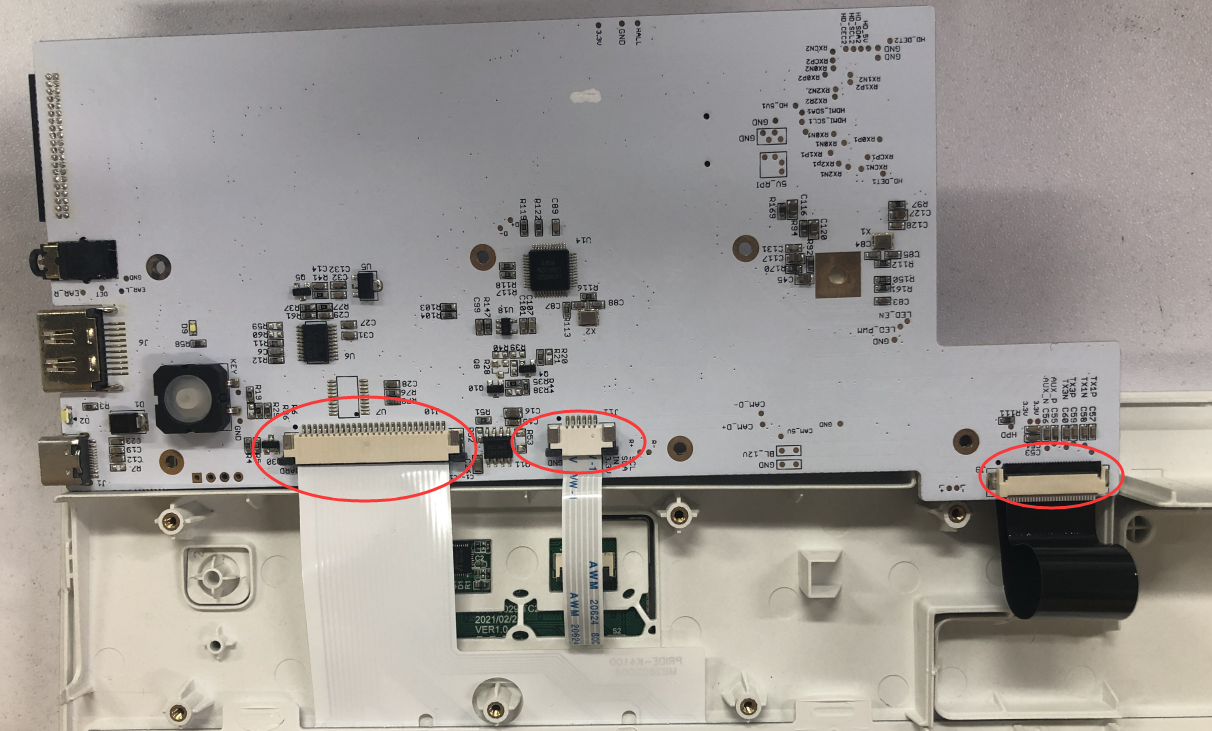
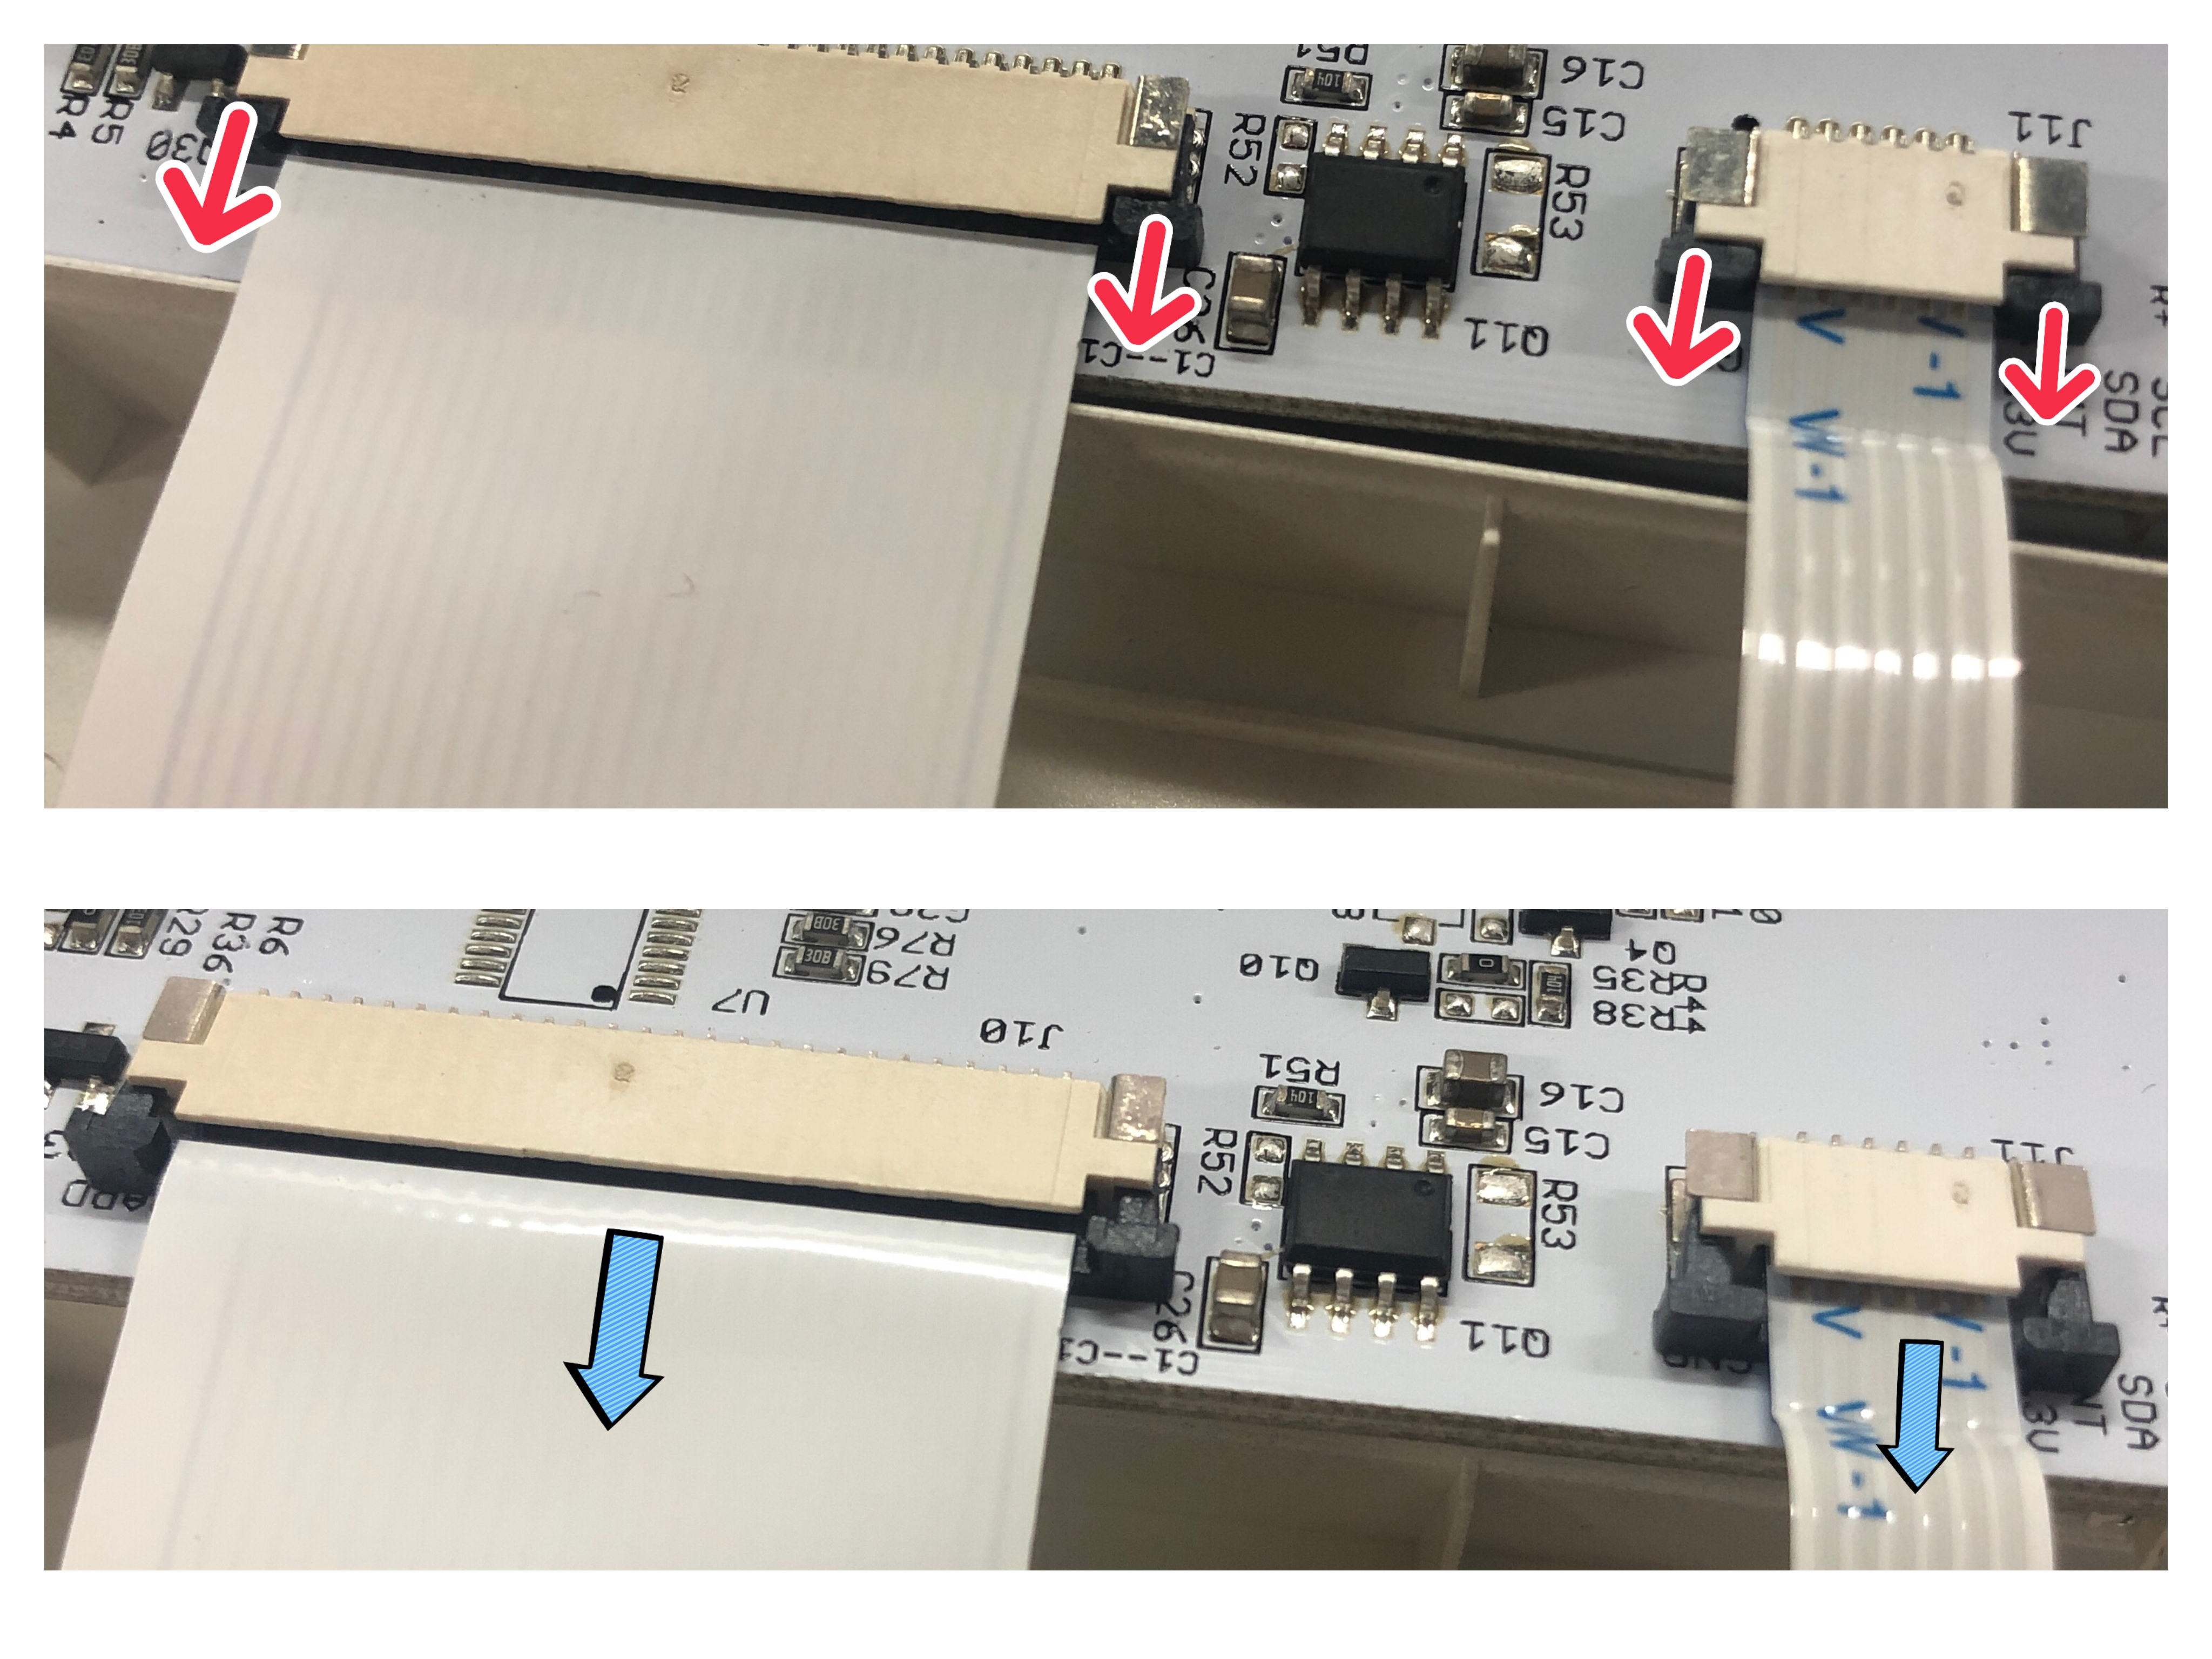
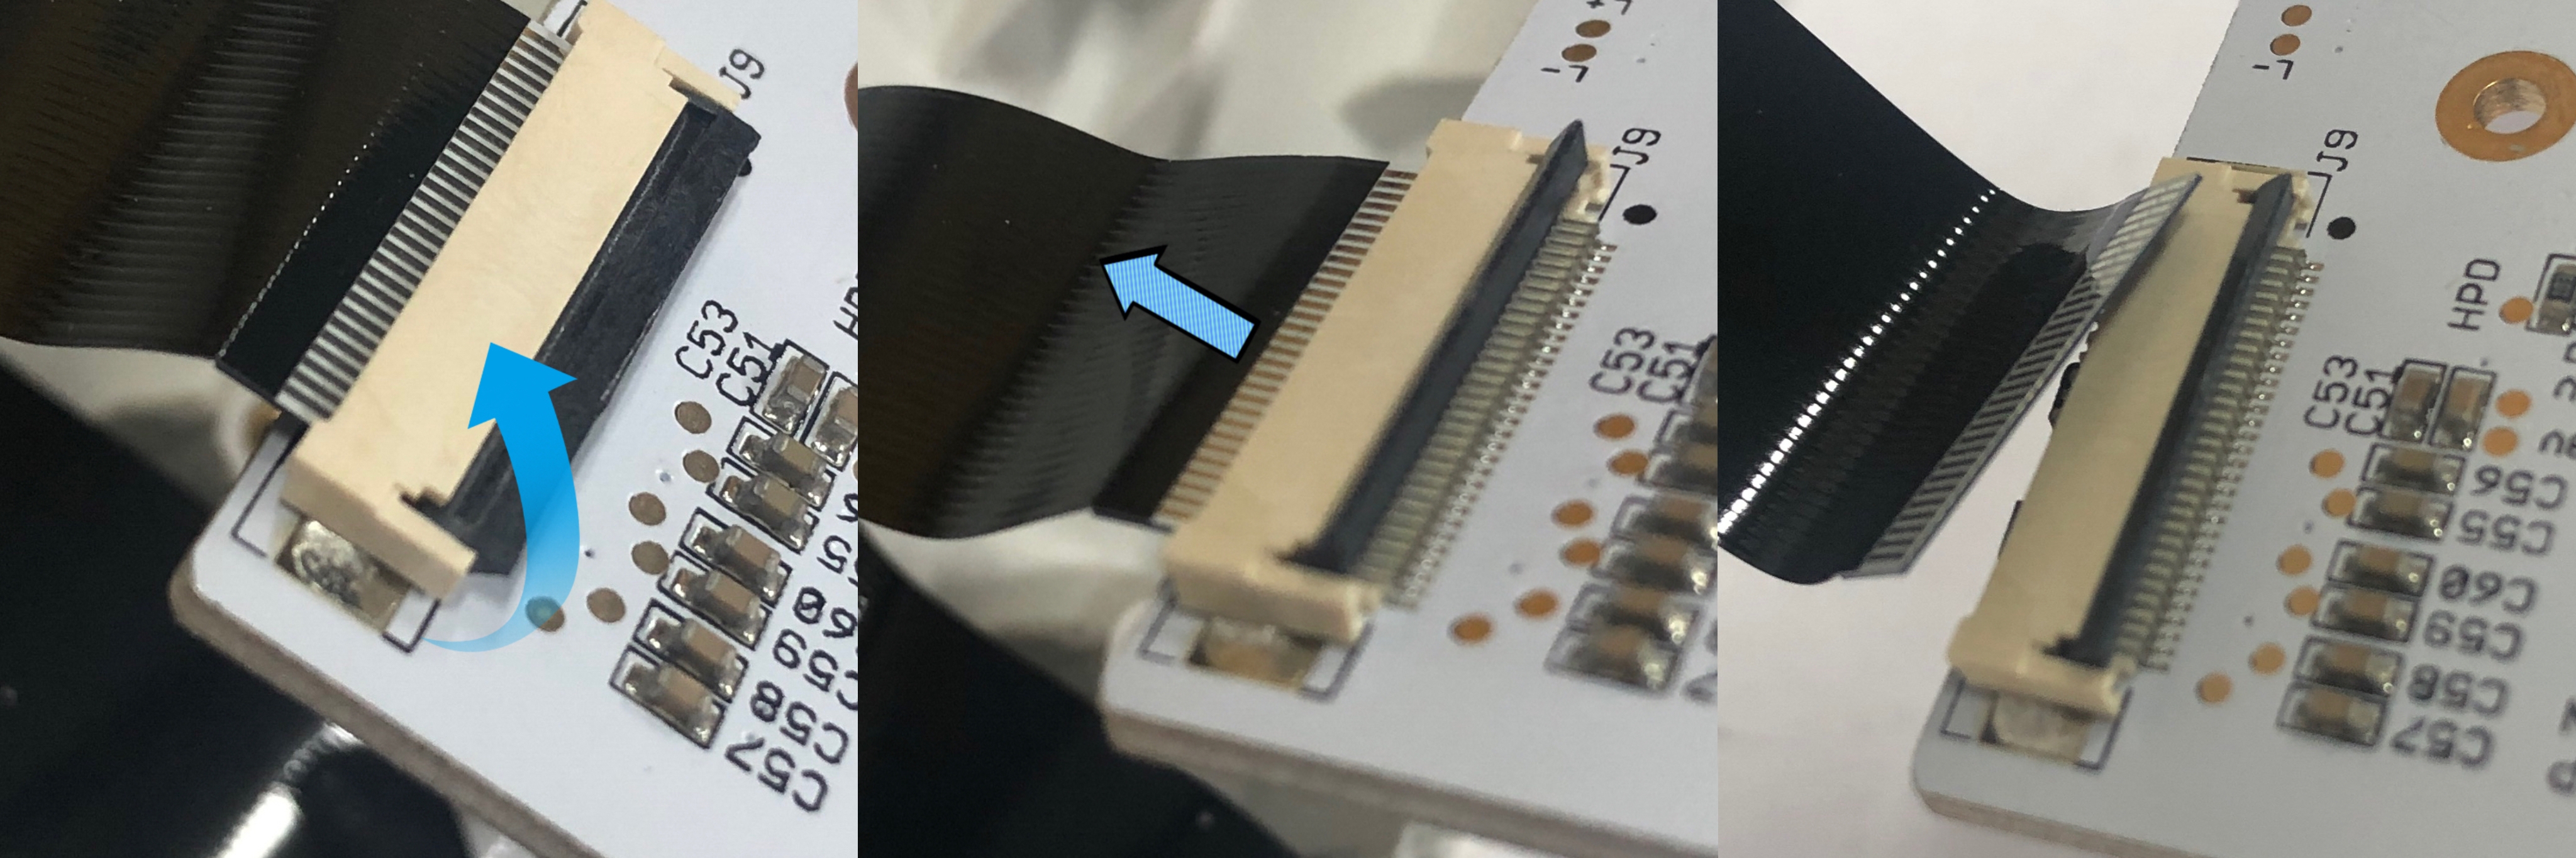
Step 6 Flip the motherboard and remove the 3 flat cables.
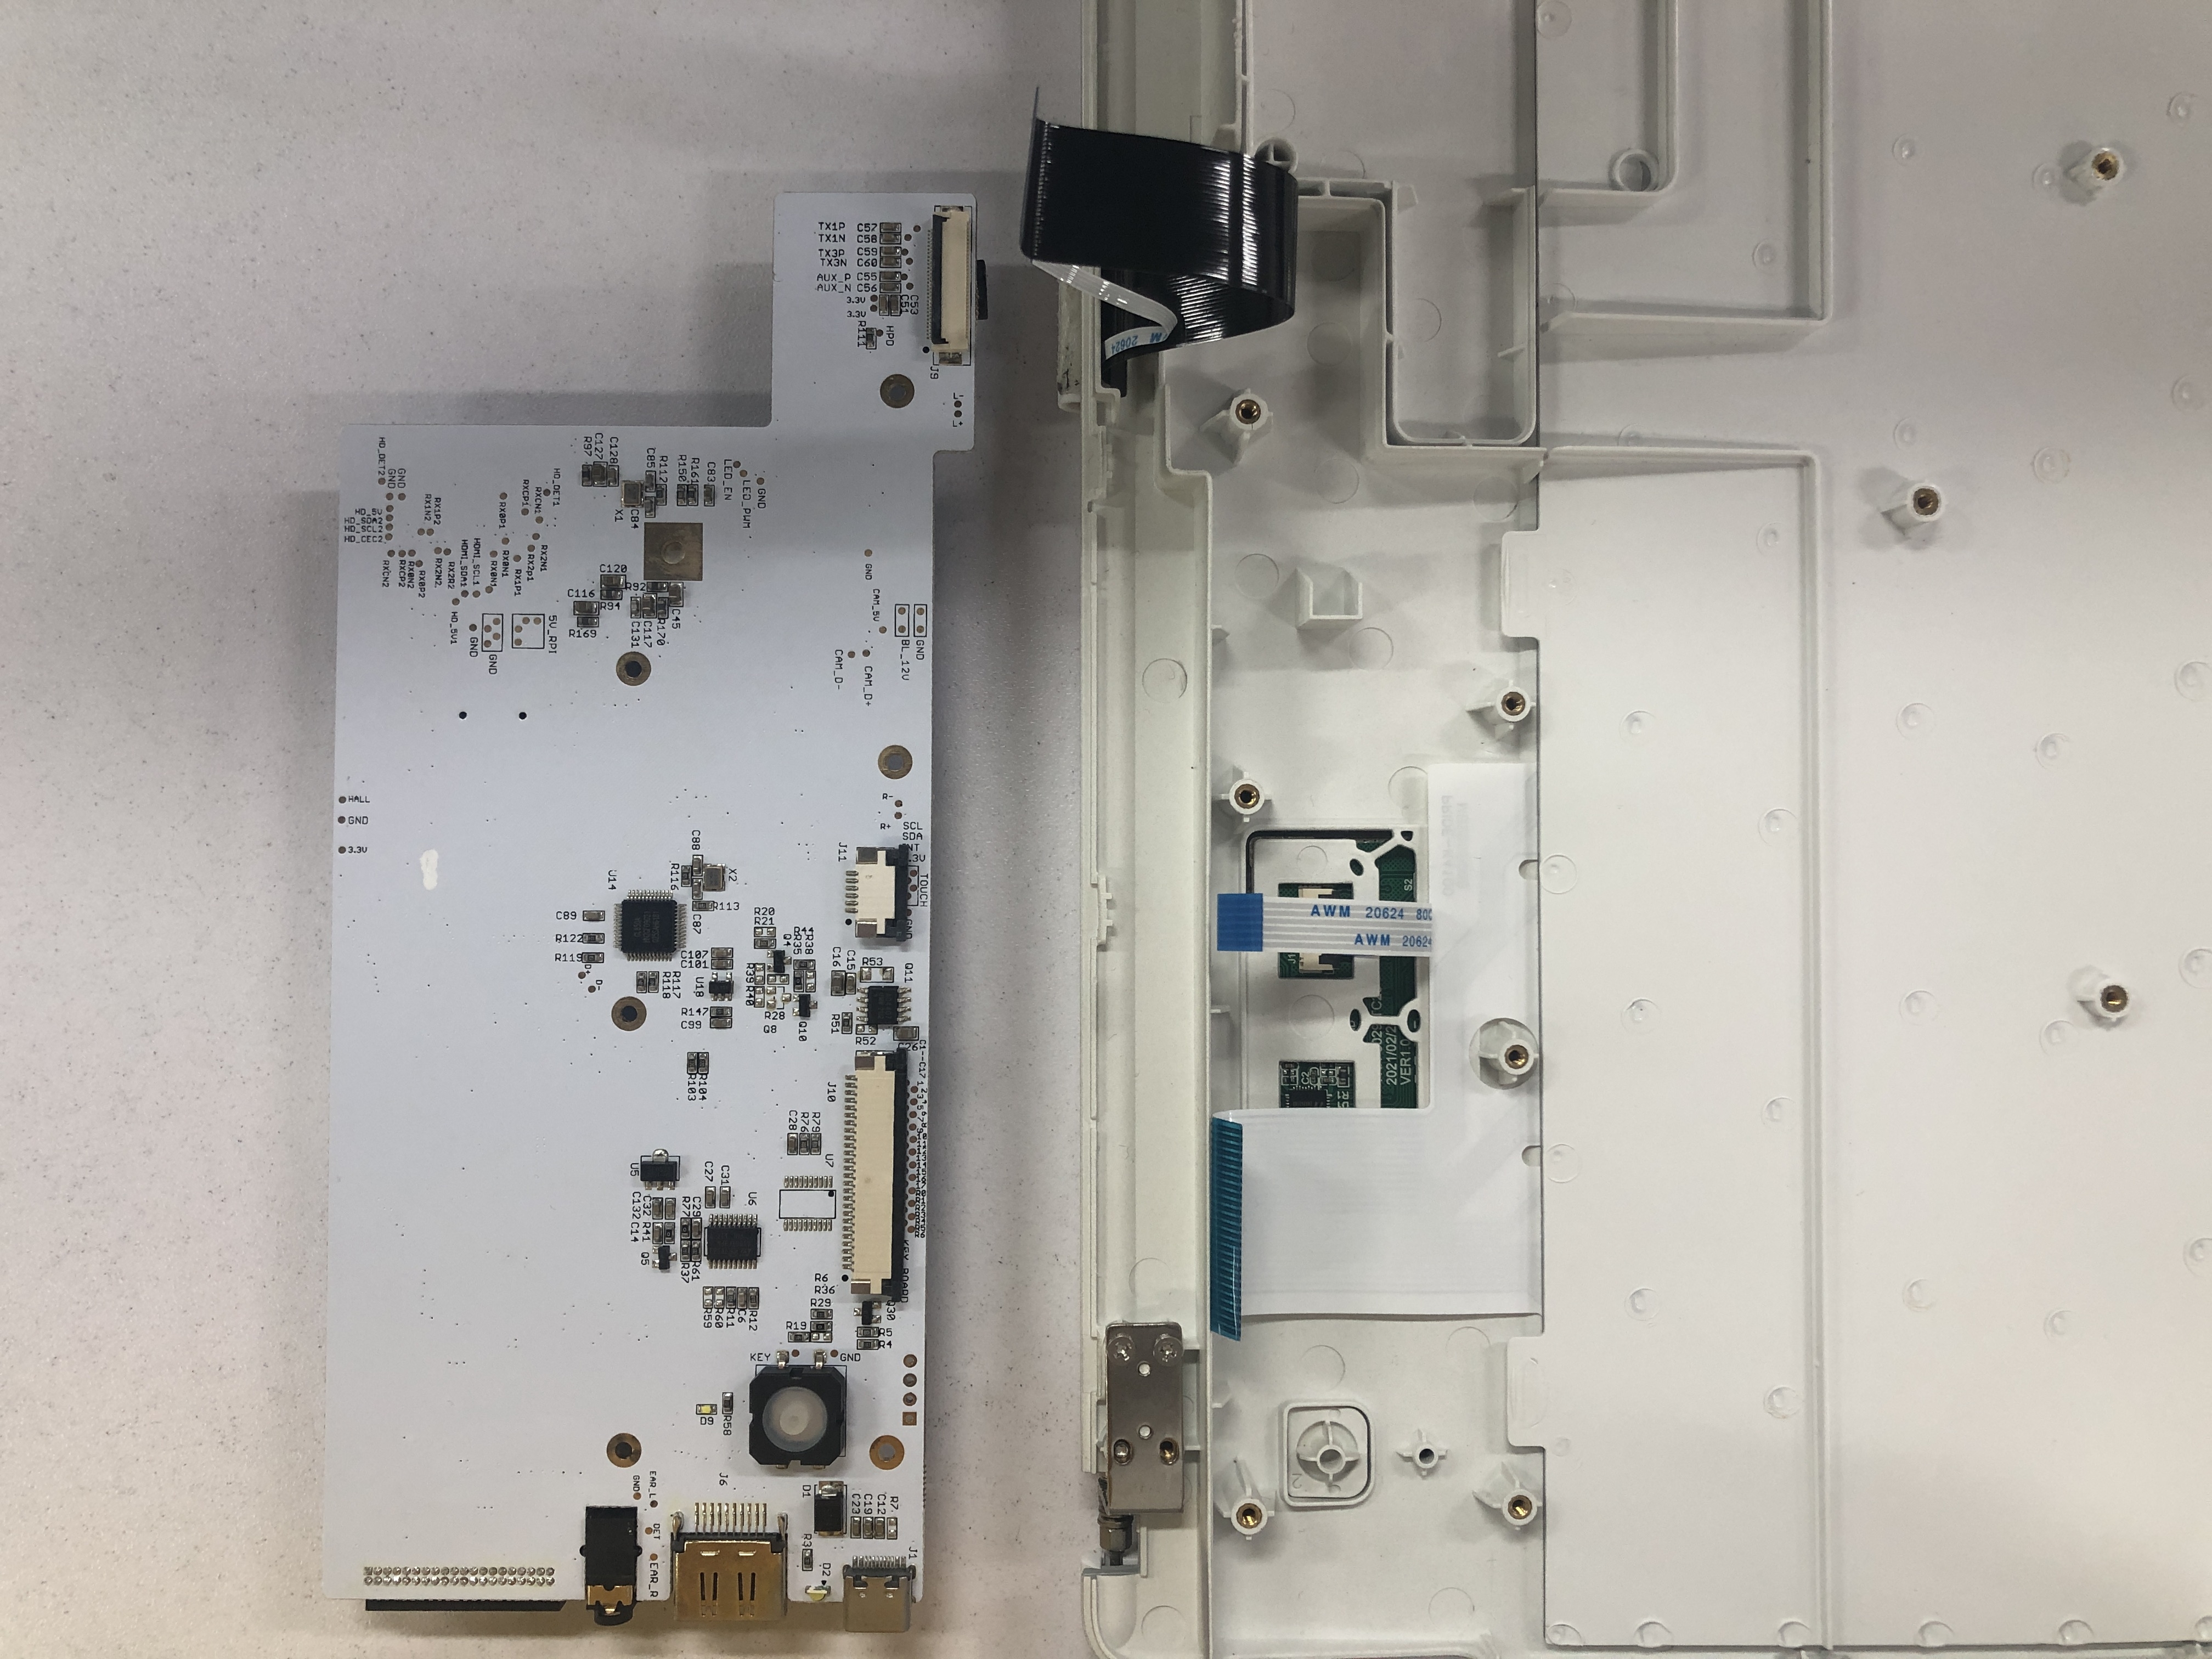
Now the mainboard has been successfully removed!
- Cross screwdriver
- T7 Torx screwdriver
Step 1 Remove the Raspberry Pi
Step 2 Use T7 torx screwdriver to move the screws
Step 3 Remove the battery cover and remove the battery. Then use cross screwdriver to remove the screws down below the battery.
Step 4 Remove the cover forcibly, and remove the speaker cables.
Step 5 Use cross screwdriver to remove the screws on the mainboard. And remove the flat cables at J12 and J13.
Step 6 Flip the motherboard and remove the 3 flat cables.
Now the mainboard has been successfully removed!
Comments
I just received today my new motherboard and I shall take extra care to replace it without breaking once more a connector!
I'm becoming a specialist of motherboard removal. To date I did it 4 times: