

How to upload the ESP32 display factory program by Arduino IDE?

Step 1 Download the Arduino IDE
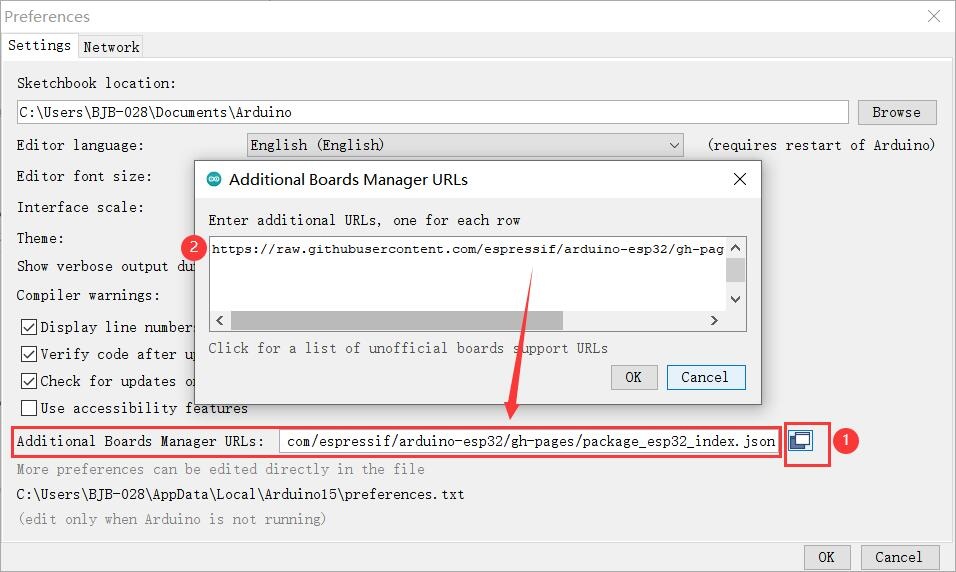
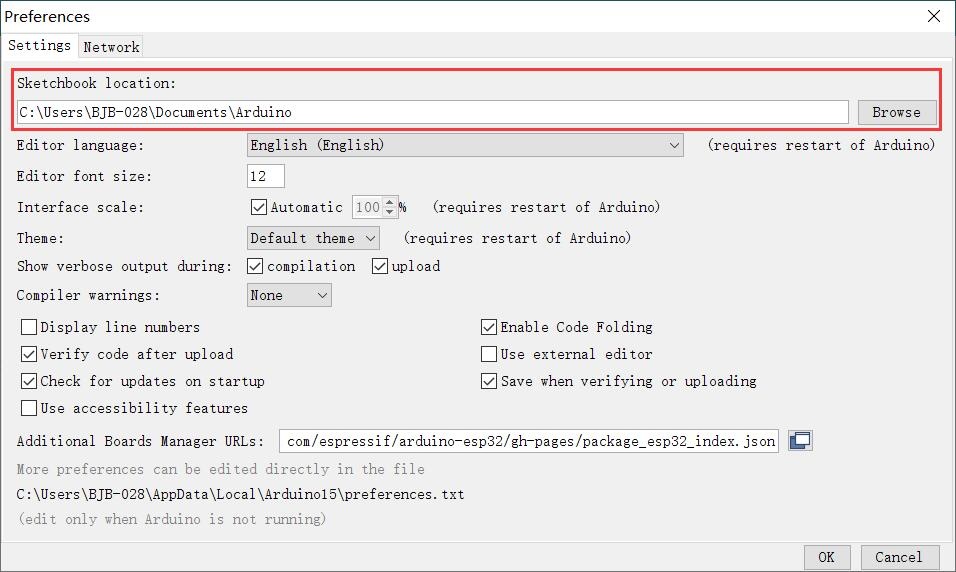
Step 2 After downloading the Arduino IDE, click on"File-->Preference", and add the ESP32 S3 URL(https://raw.githubusercontent.com/espressif/arduino-esp32/gh-pages/package_esp32_index.json) to "Board Manager URLs" as follows:
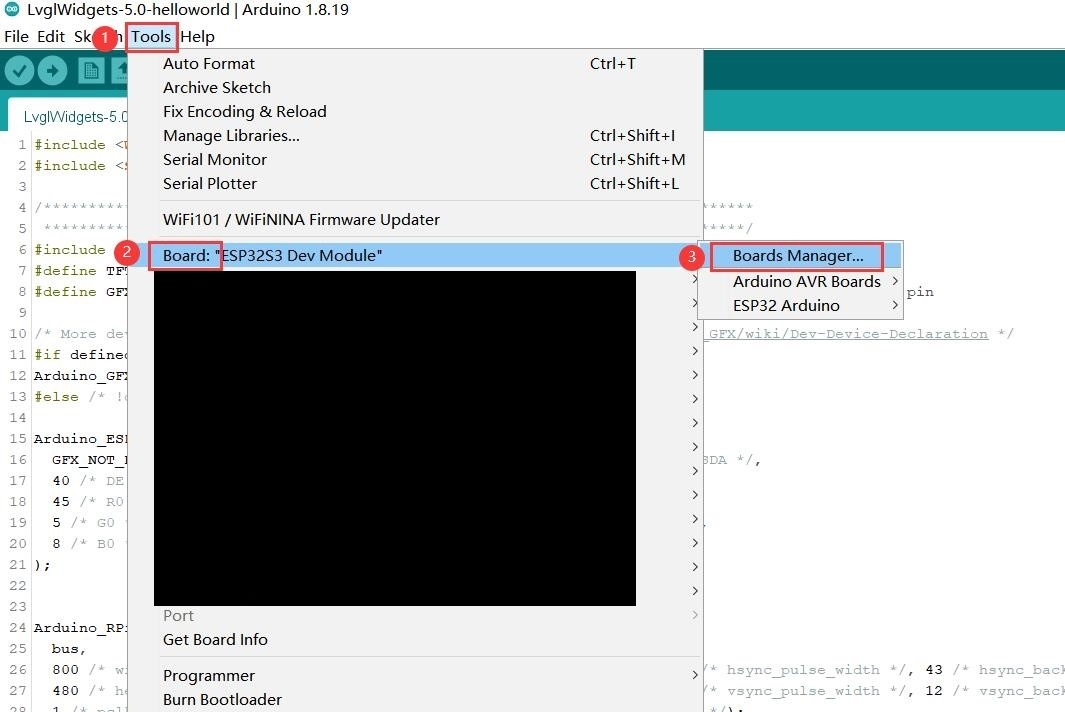
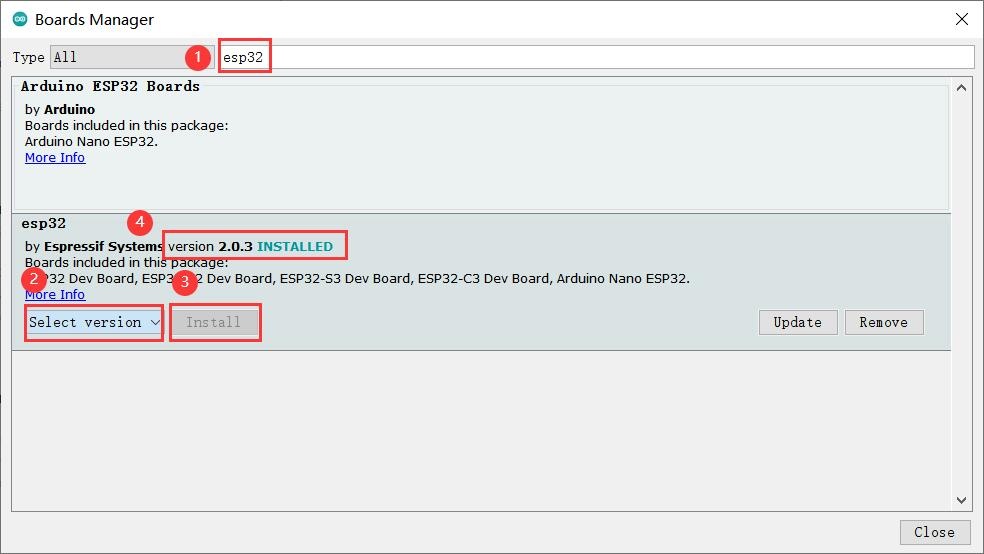
Step 3 Click "Tool-->Board-->Board Manager", and search for "esp32". Note: please don't install the 3.0.0 alpha version
Step 4 Install the libraries provided by Elecrow
Firstly download the libraries(The download links are in Step 5)
Then copy them to the Arduino libraries directory(Please note that in Linux systems, the letters in the libraries folder name are all lowercase.)
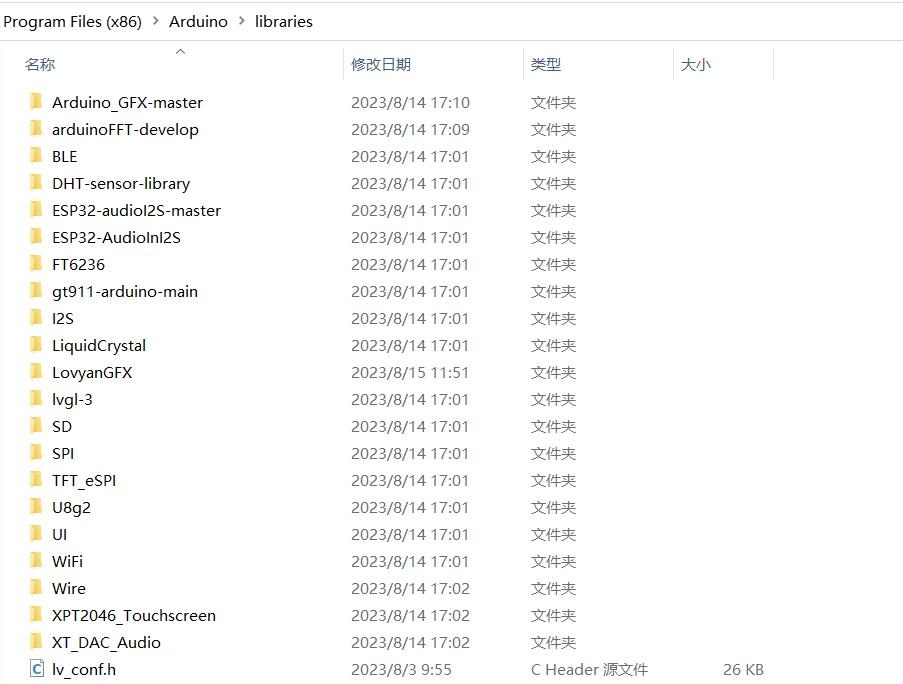
Here's the method to locate the libraries directory: open Arduino IDE→Click on "File"→Click "Preference"→then you will see “Sketchbook location”
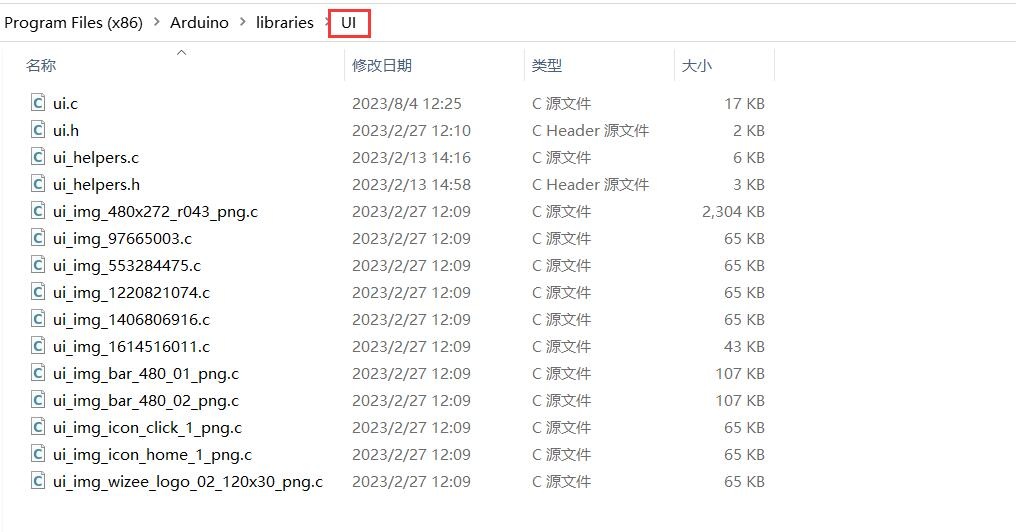
Please note that different sizes of the ESP32 display require different UI libraries, you need to replace the UI files when you using different displays.
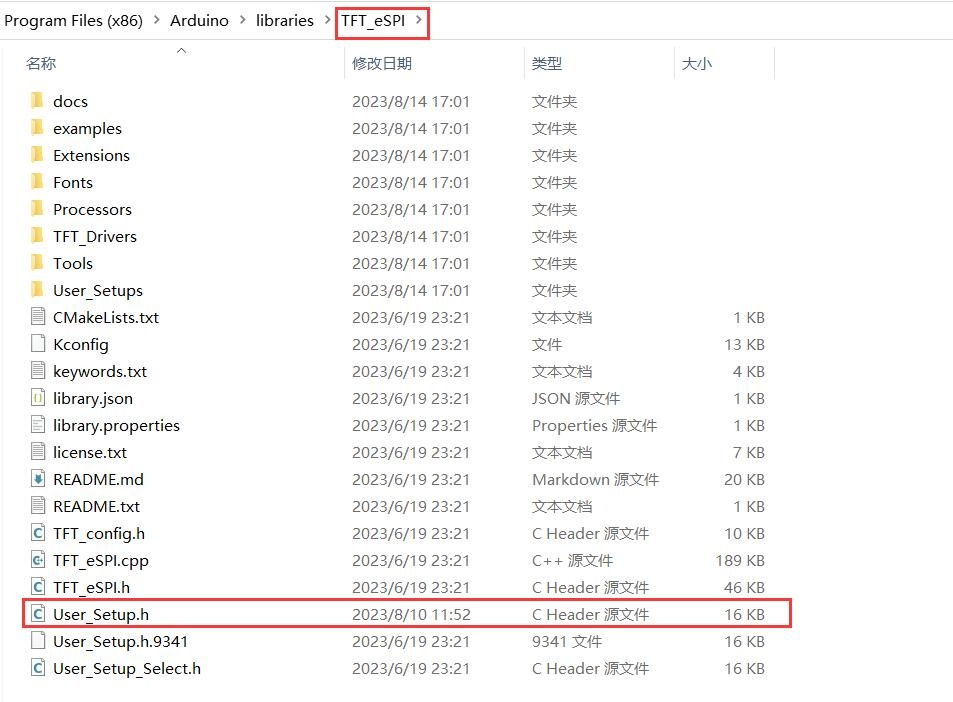
And the User_Setup.h also needs to be modified according to their screen driver(except for the 4.3''/5.0''7.0'' HMI display, which do not use TFT_eSPI library)
Step 5 Download and open the factory program. (The following links include libraries and factory demo code)
ESP Terminal RGB:
https://www.elecrow.com/download/product/DLC35010R/Arduino_RGB.zip
ESP Terminal SPI:
https://www.elecrow.com/download/product/DLC35020S/Arduino_SPI.zip
ESP32 2.4-inch display:
https://www.elecrow.com/download/product/ESP32_Display/2.4inch/Arduino_24.zip
ESP32 2.8-inch display:
https://www.elecrow.com/download/product/ESP32_Display/2.8inch/Arduino_28.zip
ESP32 3.5-inch display:
https://www.elecrow.com/download/product/ESP32_Display/3.5inch/Arduino_35.zip
ESP32 4.3-inch display:
https://www.elecrow.com/download/product/ESP32_Display/4.3inch/Arduino_43.zip
ESP32 5.0-inch display:
https://www.elecrow.com/download/product/ESP32_Display/5.0inch/Arduino_5inch.zip
ESP32 7.0-inch display:
https://www.elecrow.com/download/product/ESP32_Display/7.0inch/Arduino_7inch.zip
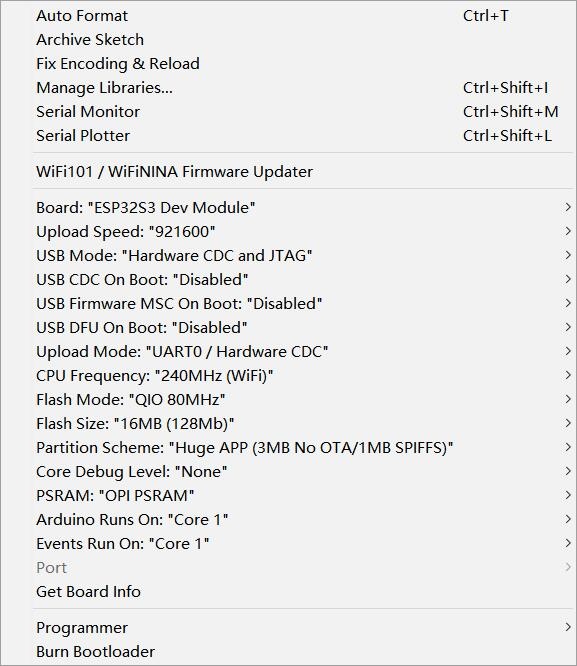
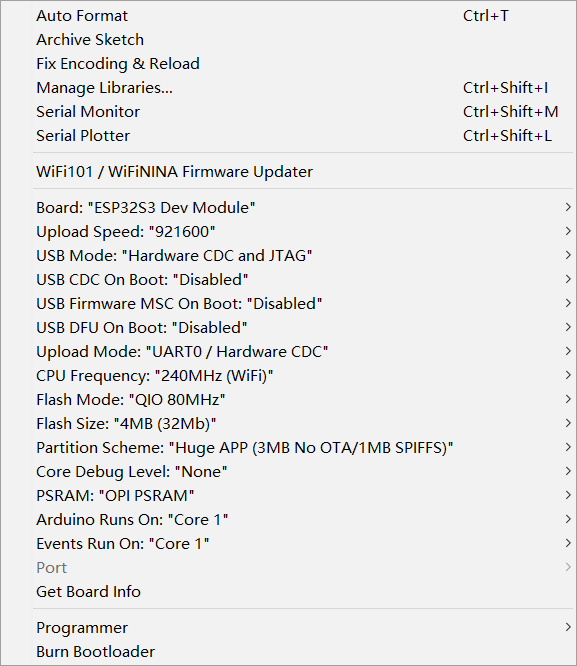
Step 6 Choose the board and set the parameter on Arduino IDE
Open Arduino IDE→Click "Tool"→then choose the correct board and parameter
✨ESP Terminal RGB&SPI
✨ESP32 HMI Display 2.4''&2.8''&3.5''

✨ESP32 HMI Display 4.3''
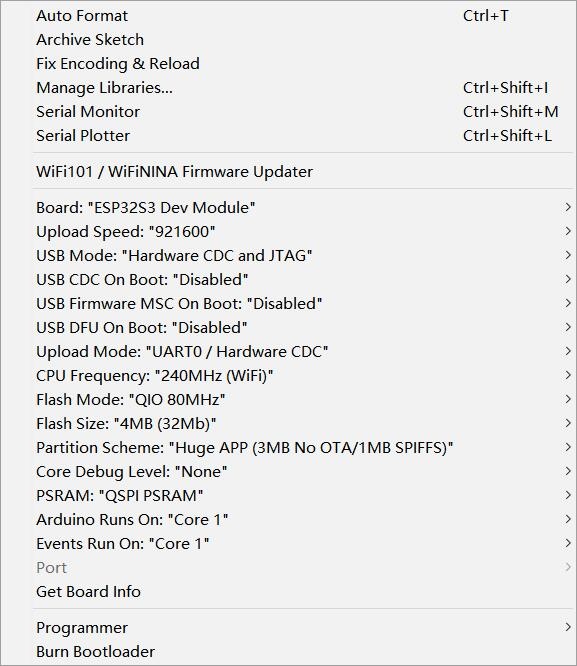
✨ESP32 HMI Display 5.0''&7.0''
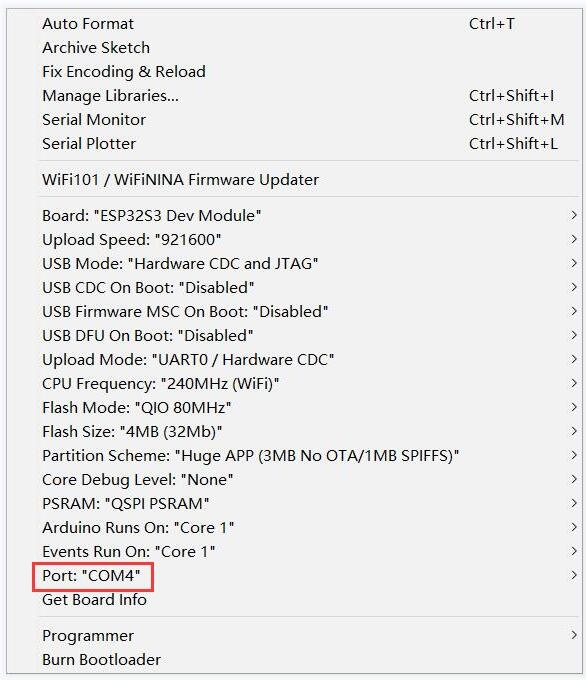
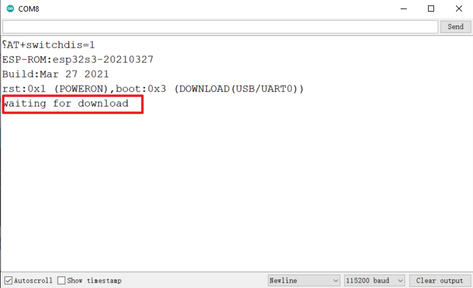
Step 7 Choose the correct port number. Open the serial monitor. Press and hold the "BOOT" button and press the "RESET" button, the serial monitor shows "waiting for download". (Baud rate: 115200)
Step 8 Then click on "Upload" and wait for the compilation and download...
👉️Back to FAQ page👈️
Comments
Here's the tutorial video for ESP terminal:
Here's the tutorial video for 2.4''/2.8''/3.5'' ESP32 HMI display:
Here's the tutorial video for 4.3''/5.0''/7.0'' ESP32 HMI display:
"And the User_Setup.h also needs to be modified according to their screen driver(except for the 4.3''/5.0''7.0'' HMI display, which do not use TFT_eSPI library)"
Step 7 Choose the correct port number. Open the serial monitor. Press and hold the "BOOT" button and press the "RESET" button, the serial monitor shows "waiting for download". (Baud rate: 115200)
To bring my Board "ESP32S3 5Zoll" in BOOT Mode, i press +hold the BOOT BUTTON, and than i plug the Power Cable in, wait 3sec, and release.
Hello @Pit ,
The User_Setup.h provided are modified.
And yes, you can bring the board to BOOT mode by holding the BOOT button and inserting the USB-C cable simultaneously.