

Burning the factory firmware tutorial of CrowPanel Pico Display

1. Preparation:
* USB-A to Type-C cable
* Laptop/PC
* CrowPanel Pico Display
2. Flash the firmware:
Step 1
Download the firmware with corresponding of the display size.
Step 2
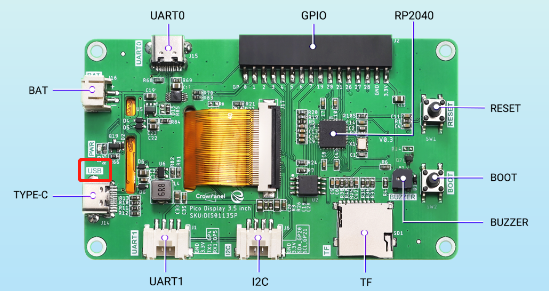
Connect the Type-C interface of the Pico Display. Note: Connect the Type-C port whose silk print is USB.
Step 3
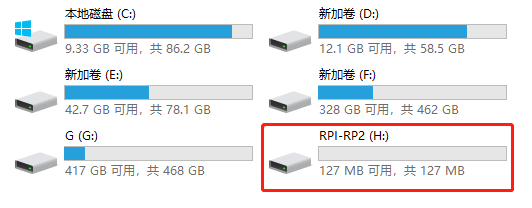
Press the 'BOOT' button first and then connect the USB-A of the PC/laptop until aU disk pops up in the PC/laptop, then release the 'BOOT' button.

Step 4
Drag the downloaded firmware to the U disk that just popped up.
Step 5
Wait a minute. If the interface disappears, the firmware is burned successfully.
Step 6
In the last step, we press the 'RESET' button of the Pico Display to restart and it will show the Demo.
Tagged:
Comments
I found your tutorial on burning the factory firmware for the CrowPanel Pico Display both clear and empowering—you’ve turned what could be a daunting task into something really approachable! The step-by-step explanations, especially around setting up the bootloader and avoiding common pitfalls, show how much care you put into ensuring success. It got me thinking about how, just like during Fajr Time in Karachi when everything is calm and fresh, these early tech moments are perfect for tackling a project with a clear mind. Have you ever found that doing this kind of hands-on work in the quiet hours makes debugging easier or more enjoyable?