

pico 2 starter kit -how to upload programs

**1.Use a cable to Connect the device to the computer.
**2.Download Code and Libraries
The code and library files have been updated. Please scroll to the bottom of the following page and download the files from the red-highlighted section as shown in the screenshot:
https://www.elecrow.com/wiki/All-in-one_Starter_Kit_for_Pico_2_with_Common_Board_design.html

**3.Please place the downloaded library files in the Arduino runtime library path.
Here's how to do it:
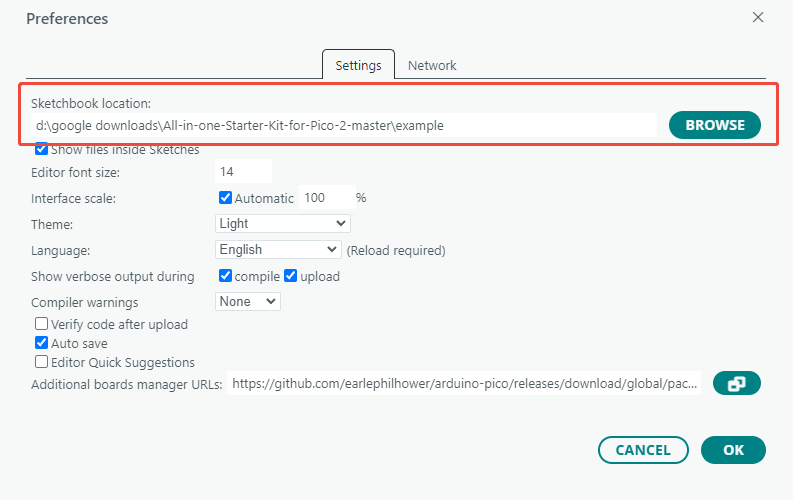
Go to File > Preferences in the Arduino IDE. In the "Sketchbook location" field, copy the path shown there and paste it to any blank document file and then add “\libraries” to the end of the path — this is your Arduino runtime library path.
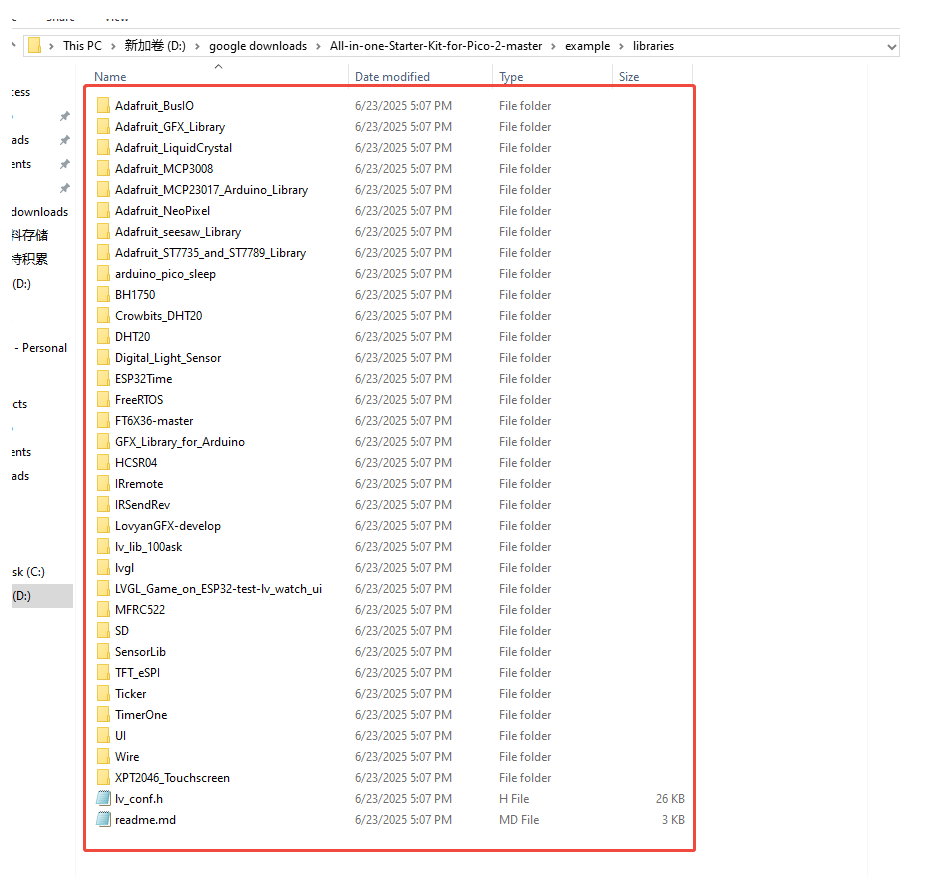
Open this path in the computer file folder, then copy and paste all the contents(as shown in the image below) from the Libraries folder you downloaded into it.
**4.Double click the .ino file in one lesson folder from the code we provided to open it in Arduino IDE .
for example:

**5.Board installing and selecting
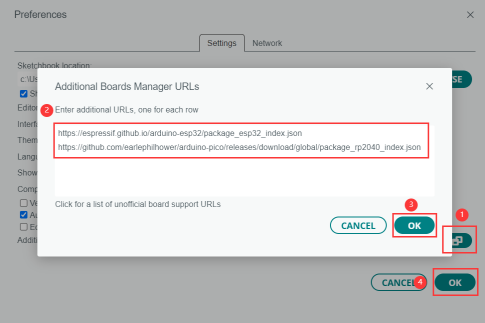
(1) Configure Additional Boards Manager URLs:
In the Arduino IDE, click on File → Preferences, then paste the following URL into the "Additional Boards Manager URLs" field:. Then Click OK.
https://github.com/earlephilhower/arduino-pico/releases/download/global/package_rp2040_index.json

(If you need to add multiple URLs, click the icon on the right to open the pop-up window and add URLs. Different URLs need to be separated by line breaks, and then click OK.)
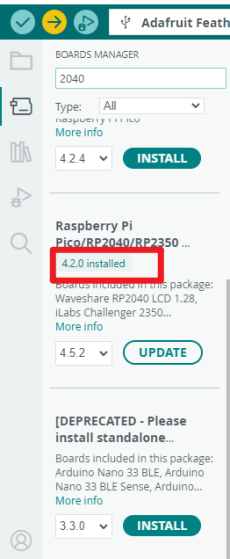
(2) Install the Required Board:
Click on Tools → Board → Boards Manager, search for "2040", and install the following board.
Make sure you have installed version 4.2.0 of the Raspberry Pi Pico / RP2040 / RP2040 board package in the Arduino IDE. Use other versions may cause errors.
(3) Click Tools → Board,Select the Board "Adafruit Feather RP2350 HSTX" as shown in the following image :

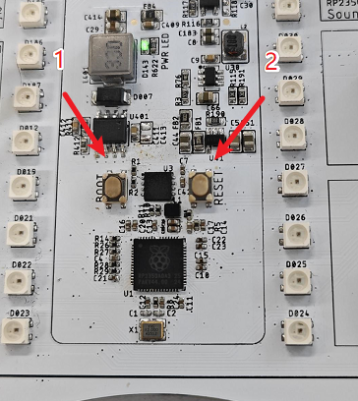
**6.Enter bootloader mode manually using the following method:
Step 1: long Press and hold the BOOT button, then short press the RESET button.
Step 2: Release RESET first, then release BOOT.
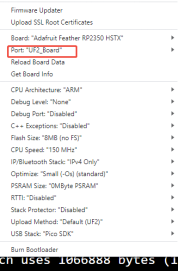
**7.In the Arduino IDE, go to Tools > Port, and select the port labeled “UF2_PORT”, as shown in the screenshot below.
**8.After completing the steps above, click “Upload” icon in the Arduino IDE to upload the program.
